Those of us who still build the occasional model airplane on a rainy weekend have noticed that the small hobby shops that filled their shelves with colorful boxes of airplanes, tanks and the occasional 1967 Chevy Camaro have been disappearing from the American landscape. The classic model companies of our youth—Comet, Hawk and Lindberg—have also gone away. Even 1970s and ’80s stalwarts like Revell and Monogram combined forces at one point but have since been bought by a German business group.
Over time tastes also changed and the older, less-detailed kits became a bit passé. Modelers wanted more accurate scale models that they could build into “museum quality” reproductions. We wanted to build the P-51D, not the B version, and have a better choice of bombs or rockets and at least three different choices of markings. The heavy steel molds that produced those earlier kits wound up on warehouse shelves, waiting to be melted down.
Or maybe not.
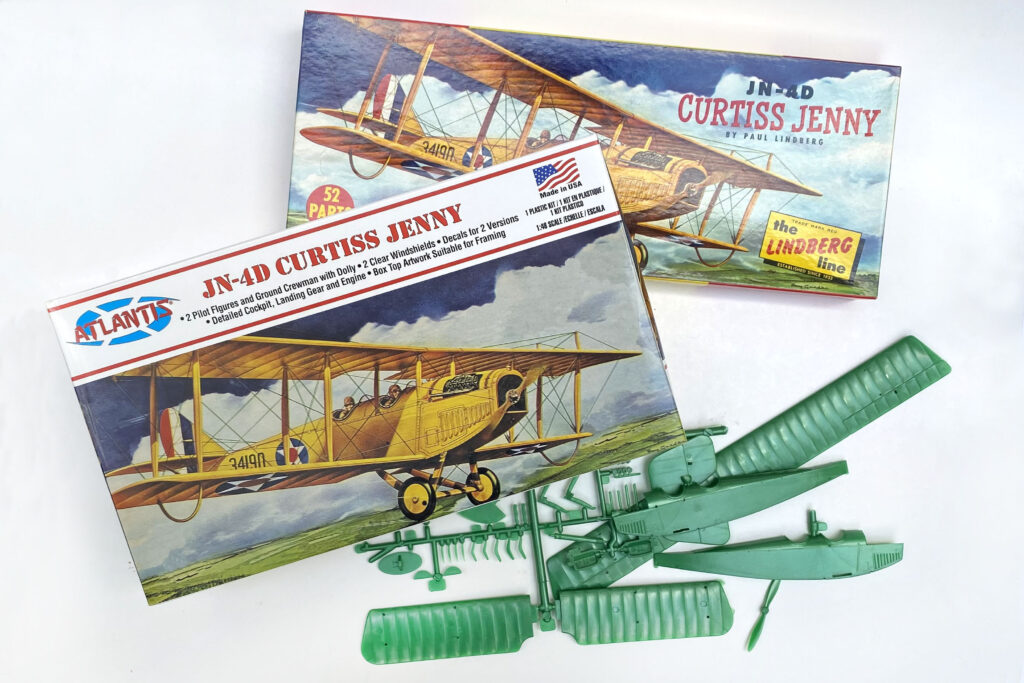
In 2009 Atlantis Hobbies, based on Long Island just outside of New York City, began looking for some of those older out-of-production molds. Their mission was to produce nostalgia by bringing back the classic kits that got us all started. They quickly amassed a veritable museum of plastic model history, nostalgic items that can fill important spots in any collection. They range from rare aircraft like the P6M Seamaster and Convair 990 airliner to the Creature from the Black Lagoon and the “Rat Fink” hot rods of the 1960s. For me, Atlantis brought back memories of building kits while trying desperately to keep glue from getting on the kitchen table. I’m looking forward to the next addition to their collection and a few more memories on some rainy weekend.
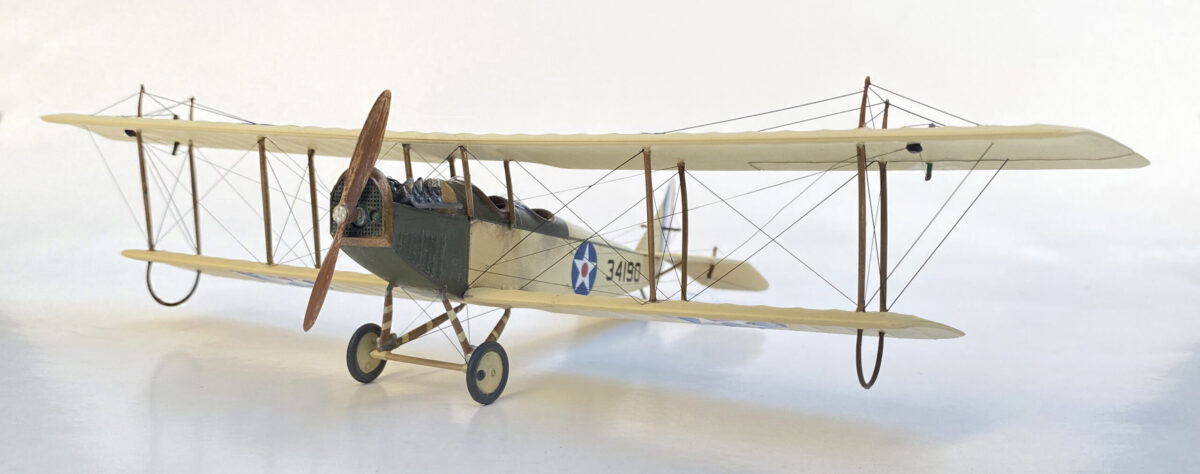
One of Atlantis’s classic kits is the 1/48th-scale Curtiss JN-4D Jenny, originally produced by Lindberg in 1955. Lindberg was an early plastic scale-model company in the United States, producing a wide range of imitation boats and automobiles in the 1940s. Their line of airplane kits ranged from early Cold War fighters to the classic biplanes of World War I. Light on detail, which is typical of the time, the Lindberg Jenny is simple to put together and reasonably accurate. Perhaps skills learned over the years will help you make a more detailed version this time around.
The model is molded in a deep green color. After cleaning up the parts in a solution of water and dish soap, adding a coat of a light-colored primer is good idea. Now it’s time to get down to business.
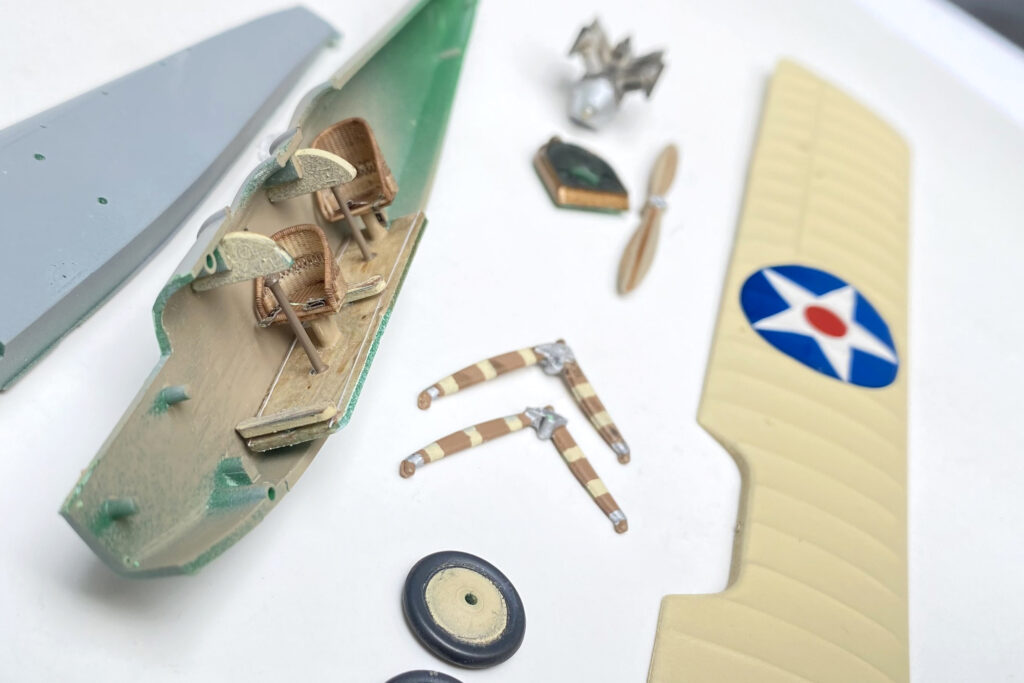
Like the real thing, the cockpit is a simple affair—two seats, control sticks, rudder bars and a pair of shapes that double as control panels. Paint the cockpit floor and the control panels a light tan, then lightly streak with a darker color to imitate wood grain. Paint the inside of the cockpit area a slightly darker tan. A pair of after-market resin seats with a period wicker look will take the place of the kit parts. Add a pair of simple seat belts to give cockpit some extra interest. The kit provides a couple of decals that represent the few cockpit instruments.
It’s time to finish the fuselage. The two halves fit well, but here’s here where the kit shows a little of its age. Minor flash and sink marks from the original molds are unavoidable and need a little care. Filling and sanding these flaws will require a bit of putty and a fair amount of patience. They are most noticeable across the lower wing. Once everything is smooth, you’re ready to get painting. For this military version of the airplane, the fabric part of the fuselage (to the rear of the cockpit) should be a pale tan color. The forward section was made of metal and should be masked off and painted olive green. The edge of each cockpit was lined with leather, so paint that area a reddish-brown color and set aside the finished fuselage to dry.
Next, paint the wings, rudder and horizontal stabilizer the same light tan color as the fuselage. The struts should be a darker wood brown. Landing gear struts and the tail skid should also have that wooden look.
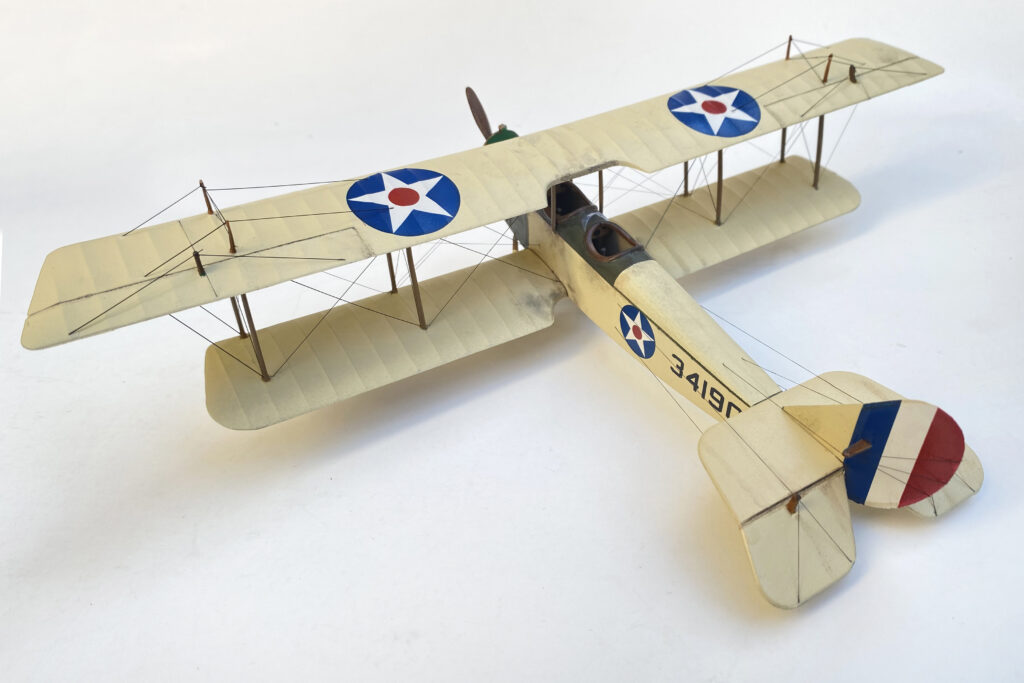
Cement the lower wings, horizontal stabilizer and rudder to the fuselage. Give the assembly a coat of clear gloss and you can begin to add the airplane’s markings. Decals are a simple affair, and the kit has a nice set replicating the original version that came with the old Lindberg kit. Markings for a post-war Barnstormer and a color guide that shows a more historically accurate U.S. Army Air Service color scheme are provided with the instructions.
It’s time to attach the upper wing, always a part of the build I found tricky when I was younger. Take your time as you place the struts into their positions. Carefully add the landing gear and tail skid and the Jenny starts to look like the classic trainer it is. Give the airplane another coat of clear varnish to seal the decals.
The JN-4D is a web of rigging, wires and cables that control ailerons and stabilizers and supporting struts that hold the whole thing together. It has a spindly, fragile look that belies the stable airplane that it was. Pay close attention to your research in order to accurately rig the airplane. Open up that big box of patience; you’ll need it and probably spend more time here than you did actually building the airplane. The results will be well worth the effort.
Start rigging from the center and work out toward the wingtips. A number of companies produce a thin thread that is easy to use with a bit of superglue. “Old School” modelers might opt for thinly stretched sprue, a time-consuming technique to master. Tackle the back half of the airplane with the cables connecting the horizontal stabilizer and rudder. Remember to step back from time to time in order to let the cement cure and not get too far ahead of yourself. Patience.
With the complex rigging complete, it’s time to add the engine, radiator and propeller. Paint the engine aluminum with a dark wash to pick out details. Paint the radiator a metallic color and the area around the outside copper. The propeller should be painted a brown “oak” and you can drybrush a darker color to simulate streaks of wood grain. The hub is steel. Many props were fitted with metal tips and a leading edge. A touch of brass colored paint does the trick.
The kit comes with two tiny clear windscreen parts. While you might want to use them, cutting two pieces from a sheet of clear plastic looks a bit more to scale.
With the windscreens attached and the Jenny fully rigged, it’s time to find it a prime spot among your collection of early biplanes.
Atlantis gave me a couple of nostalgic weekends, and I appreciate the reminiscing and the chance to add a classic airplane to my display shelf. I look forward to getting another taste of nostalgia soon.