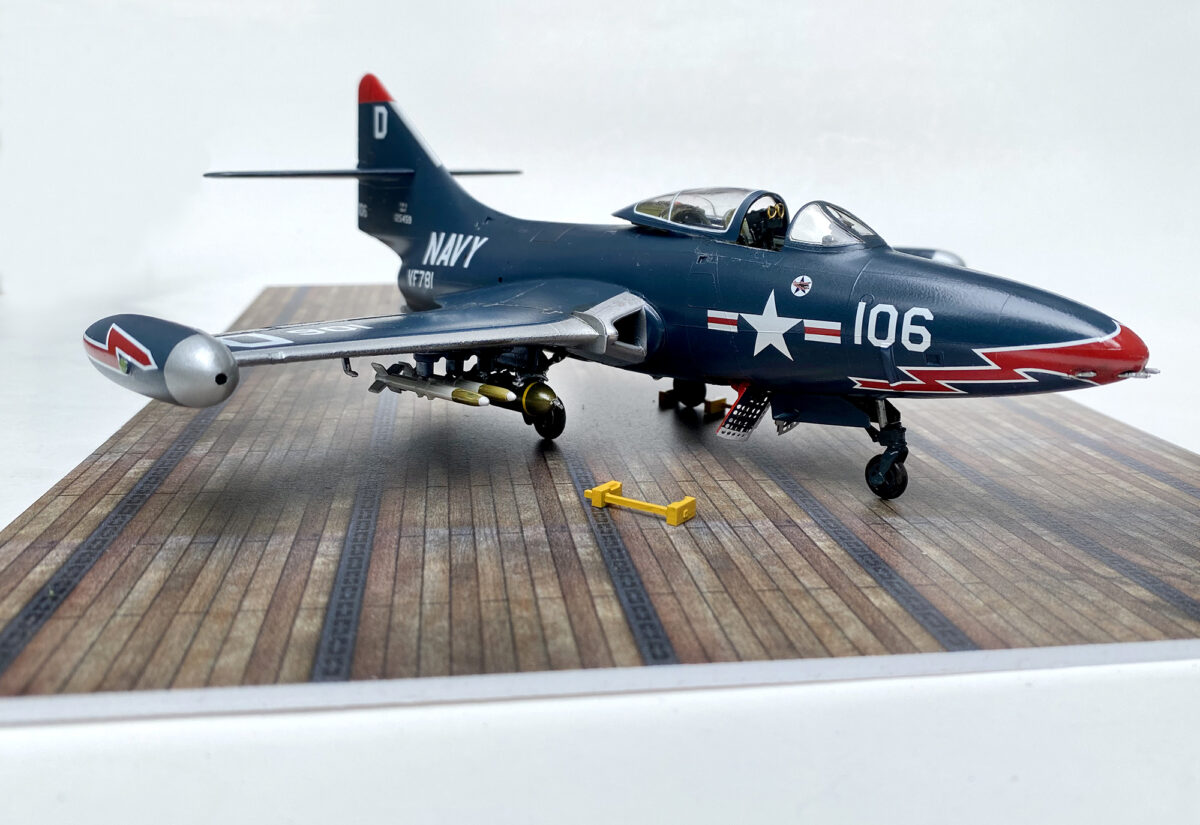
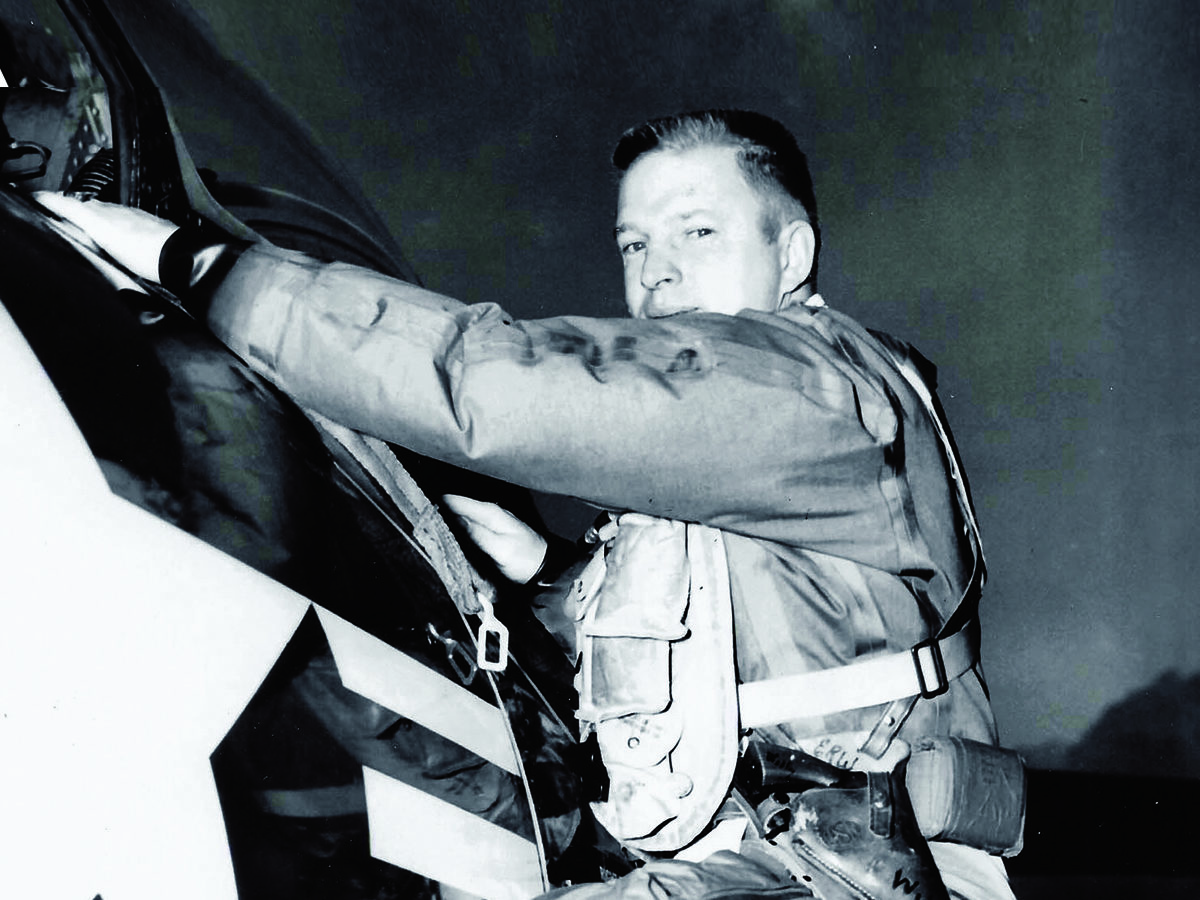
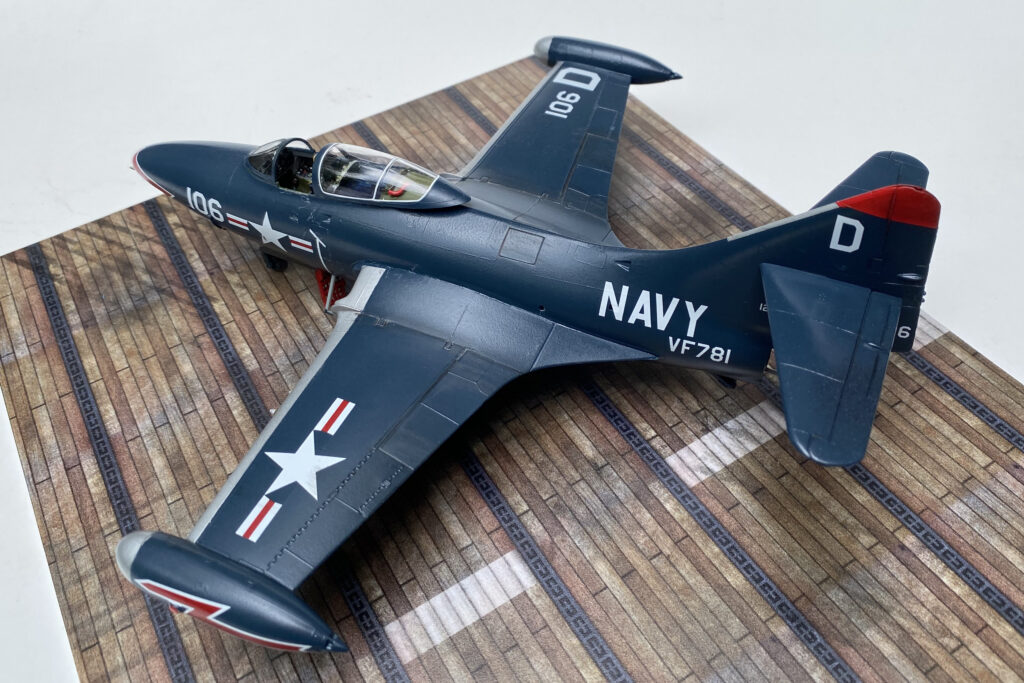
Monogram released their 1/48-scale Grumman F9F-5 Panther in 1990. While newcomer Trumpeter has released two other versions of the jet, both are earlier editions of the fighter. To build the later F9F-5, the classic Monogram kit is still the way to go. The subject of this model is the F9F-5 Panther that Lieutenant Royce Williams flew on November 18, 1952, when he downed four Soviet MiG-15s, as covered “The Secret Dogfight” from the Winter 2023 issue of Aviation History
Royce William’s Secret Mission
Start with the cockpit, painting the one piece “tub” an interior chromate green (FS 34151). Do the same with the interior cockpit walls inside the fuselage halves. The ejection seat is a nicely detailed four-piece affair. Paint the seat a medium sea gray and drybrush the details with an aluminum color to show some typical wear. Add a harness and seatbelts for some extra interest. Use a dark wash to highlight the raised detail on the control panels and pick out dials and switches with white paint on the tip of a toothpick.
Next, assemble the nose gear and its wheel well. At this point, leave the tire and oleo linkage for later. Cement the tailpipe and the arresting hook to the left fuselage half. Don’t forget to add weight to the nose to make sure the jet isn’t a “tail sitter.” Small lead fishing sinkers embedded in a piece of putty will work just fine. Attach the finished cockpit and nose gear assembly and bring the two halves of the fuselage together, and then then set this aside.
The instructions call for adding the four machine guns in the nose before completing the fuselage. Save those parts for later; it will make painting the fuselage easier if you don’t have to mask those tiny pieces.
After the fuselage is dry, attach the bottom half of the wing. Open up the holes that will indicate where weapons pylons will be attached. The Panther can carry a variety of bombs and rockets that are included in the kit. Follow the instructions and check your research to decide how you want to display the finished model. Add the top half of each wing and use a little putty on the seams.

Attach the horizontal stabilizers and sand the overall jet, smoothing out the seams and getting it ready for some paint.
By the end of World War II the Navy had adopted an overall glossy sea blue (FS 15042) for their aircraft, a color scheme that lasted well into the 1950s. Mask off the nose gear and the cockpit, then lay down the dark blue color. After the model has dried thoroughly, paint the wheel wells interior chromate green (FS 34151). Paint the area that will be covered by the jet’s speed brakes insignia red (FS 31136). Give the finished assembly a coat of clear gloss and set the model aside.
Next, paint and assemble the landing gear. The struts should be chromate green and the oleo a chrome silver. Paint the tires a black/brown “rubber” color with aluminum hubs. Assemble the bombs and rockets. The 500-lb. bombs should be an olive drab color with a yellow band indicating that the weapon is “live.” Aftermarket decals of typical bomb stencils are a nice touch. Each rocket should have aluminum-colored fins, a light gray body and an olive drab warhead. A dab of silver on the tip of the rocket looks like the weapon’s fuse. Give the landing gear and the weapons a quick coat of flat varnish.
In 2022 the International Plastic Modelers Society (IPMS) released an excellent decal sheet with markings for six different MiG killers from the Korean War. One of the aircraft included is the our model’s subject Royce Williams’s Panther.
Carefully and methodically add the markings to the jet. These decals look great and need only a little bit of a setting solution help them snuggle into the surface detail. Don’t rush the process. It’s tempting to do that as the model approaches the finish line, but be sure to walk away from time to time and let those decals set.
With the markings on and another coat of clear varnish, it’s time to attach the landing gear and the two speed brakes underneath the airplane. Cement the sway braces to the two inboard weapons pylons and attach the 500-lb. bombs, and then add the rockets to their pylons. Don’t forget the tiny bits—the pitot tube under the left wing, the four .50-caliber machine guns slipped into their place in the nose and, of course, the gunsight.
A little moderate weathering gives the jet the look it might have had aboard the USS Oriskany in November 1952. Accent a few panel lines, particularly the joint where the wings fold. A bit of soot and a dark wash, and some light paint chipping helps bring the model to life.
Carefully mask the clear canopy pieces and paint them the same dark blue as the rest of the airplane. Cement the forward part of the canopy using glue especially made for clear plastic or white school glue. Add the rear canopy, positioning it slid back to show off the hard work in the cockpit. Your Grumman F9F-5 Panther is now ready to head to the catapult for its next sortie. It will make a great addition to a collection of early Navy jet aircraft.