
The Bomarc surface-to-air missile was a Cold War response to the apocalyptic vision of squadrons of Soviet bombers headed toward targets in North America. A nuclear-tipped interceptor streaking toward the enemy seems the stuff of science fiction today, but in the 1950s it was an all too real strategy.
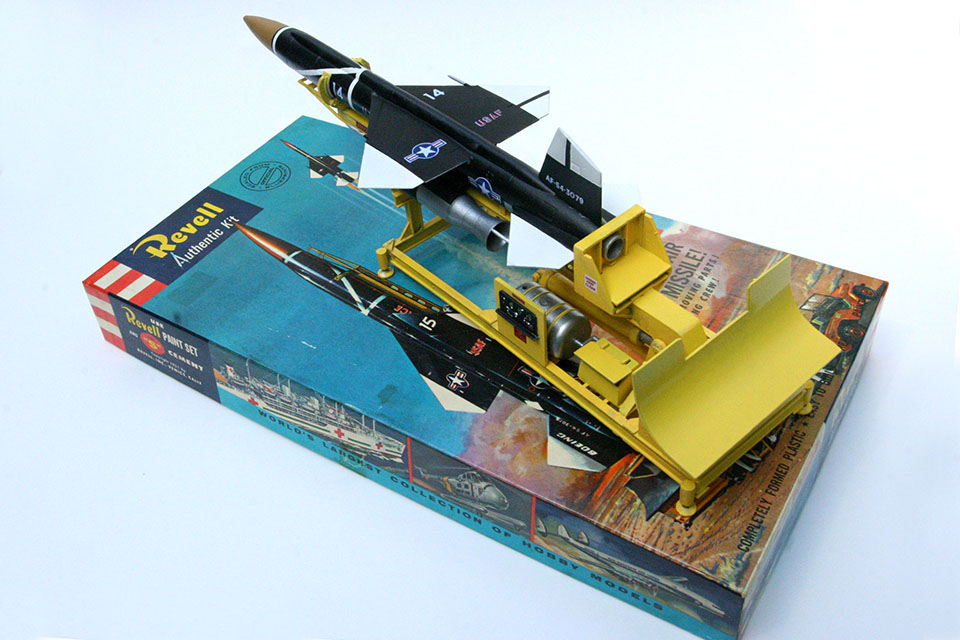
Revell has re-released its classic IM-99 Bomarc, complete with the original box art. “Revell 1958” is still neatly molded into the bottom of one of the horizontal stabilizers. With no new tooling, the parts are exactly the same as they were when the kit first hit the shelves. Ah, nostalgia.
Gather up four or five grades of sandpaper and get to work. Assembly of the missile is relatively simple, since only a dozen pieces make up the actual weapon. There is some minor flash and a few ejector pin marks, typical of older kits. Rather heavy rivets and deep panel lines will need to be sanded down. Fit is ok but seams will still need some putty, more sanding and then…some more sanding. After the fuselage, wings and tail come together, it’s time for…a little more sanding. A coat of primer or a product like Mr. Surfacer will help reveal spots that need additional filling and sanding. The two ramjet engines attached to the bottom of the fuselage should be joined, sanded and primed as well. Once those heavy panel lines are gone, re-scribing some of them using those all-important research photos is a great idea.
While the missile is drying, start on the launch platform. Dry-fit and clean up the various pieces first. Once the base is complete, you might find the frame is slightly warped—it happens frequently with kits from older molds. Dipping the frame in a bath of boiling water will heat the plastic enough to aid in bending the piece, just a bit. This will help ensure all four legs are level. The gantry is next. While construction is very simple, take time to dry-fit and sand parts so they will be easier to work with.
Prime the launch pad with a coat of white, then a nice industrial yellow. A light wash of black will make some of the detail pop. To replicate the dials and gauges on the launcher, a cockpit instrument panel decal from the parts box can be cut down. Small excess ejector pin pieces form the back of the gauges. Florist’s wire works well for some of the hydraulic lines that run the length of the launch rail.
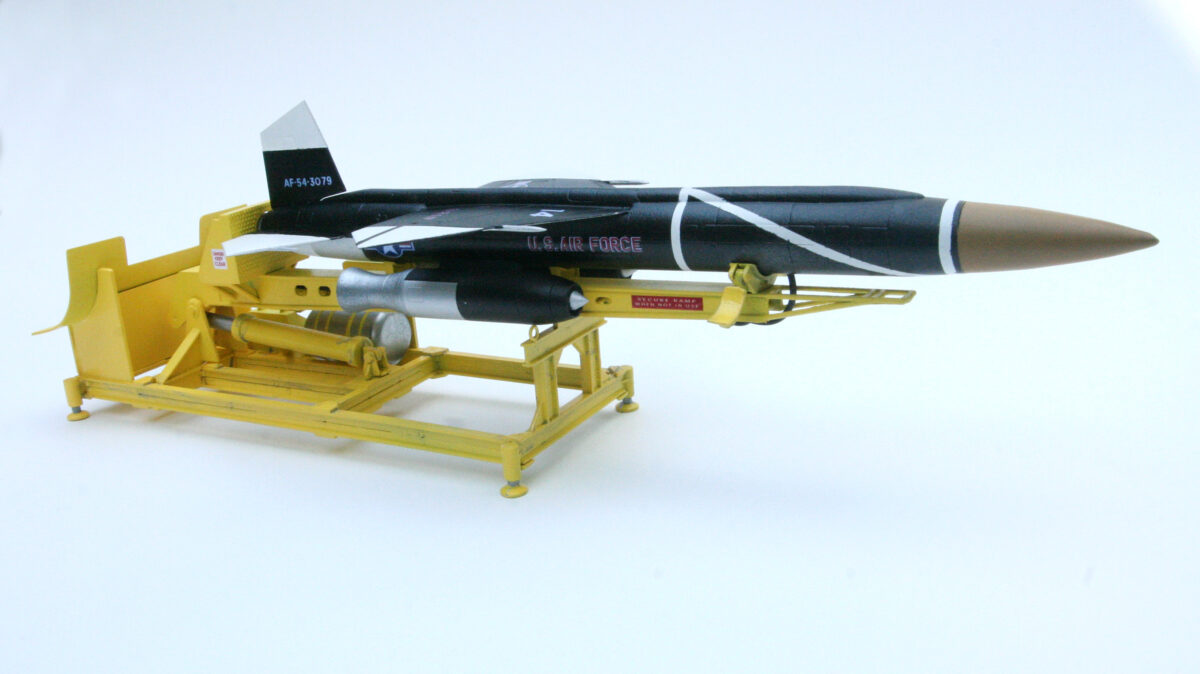
With the launch platform nearly complete, painting the missile itself is next. There are two schemes to choose from. One is an overall gray that was typical of operational missiles. A second scheme is more visually interesting, an overall black with white wingtips and geometric striping. Spray the white first, and following your reference photos, mask off the areas that will remain white. There are decals for the white striping, but masking the white before painting the rest of the missile gives a cleaner look. The nose should be a medium tan color. After an overall gloss coat, it’s time for markings. The decals are a bit thick; a decal setting solution will make them settle into the panel lines just fine.
Set aside the missile and turn your attention back to the launcher. The launch rail/gantry assembly snaps into the base, and it can be articulated so that you can display the missile either horizontally or vertically. A few decals, data plates and warning signs complete the base.
Back to the missile and some final bits and pieces. Attach the two ramjets to the underside of the main fuselage. Another layer of gloss coat and the missile is ready to be attached to the launch pad. A maintenance stand is also included as well as two figures. Finally this classic IM-99 Bomarc missile is ready to display. Building this kit brings back a lot of memories, but with the intervening years comes experience. Hopefully your completed missile looks a little sharper than it did the first time.
Want to know more about the Bomarc missile? Read The U.S. Air Force’s Pilotless Fighter from the September 2017 issue of Aviation History Magazine.