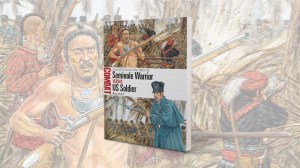
A talented young officer in the Imperial Japanese Naval Air Service, Mitsuo Fuchida was chosen by Vice Admiral Chūichi Nagumo to coordinate and lead the attack on Pearl Harbor. From his place in the center seat of a Nakajima B5N2 “Kate,” Fuchida would be able to see the state of the harbor’s defenses and command his waves of attacking aircraft.
The model company Hasegawa initially released its 1/48-scale Kate in 2001 and has offered it in a number of guises—as a torpedo plane, in a version with folding wings and in one with a single armored piercing bomb. That kit, its first version, includes markings that are not for the more popular torpedo plane, but for Fuchida’s command aircraft, the “tip of the spear” of the Pearl Harbor attack.
THE KIT
Typical for Hasegawa, the detail is accurate to a fault. Begin with the cockpit, paying close attention to the many small parts that make up the aircrew’s “office.” It was common for different manufacturers to have their own particular color of interior paint. Nakajima’s greenish gray (often called Nakajima Interior Green) is different from the greenish blue that was typical for Mitsubishi’s aircraft. Paint the cockpit parts and get started.

The control panels have nicely raised detail, but decals are provided for those of us lacking the talent for painting tiny dials and switches. The only extras needed are seat belts for the three crew positions.
Once completed, the cockpit assembly forms a tub that fits neatly between the fuselage halves. The fit is very good, but it pays to dry-fit parts first. Once everything is together, set aside the completed fuselage.
Next assemble the bomber’s engine and paint it black. Cement the engine to the firewall and drybrush an aluminum color over the engine’s cylinders to make the detail pop. Paint the main crankcase a medium gray. Paint the cowling and the forward firewall flat black. On many Japanese aircraft a flat black color extends from the cowling to the pilot’s windscreen to act as an anti-glare panel. Paint the cowling and glue it in place and then set the completed assembly aside.
It’s time to attach the large broad wing to the fuselage. Again, the fit is very good and requires minimal filler and sanding.
The modeler can pose with the flaps dropped, as they would be upon landing, or up, creating a cleaner profile. Moveable surfaces like the rudder, ailerons and the horizontal stabilizer were fabric covered on the real airplane and should be painted on the model with the same color as the bomber’s interior. The rest of the airplane was left natural metal. Paint your upper surfaces a dark green.

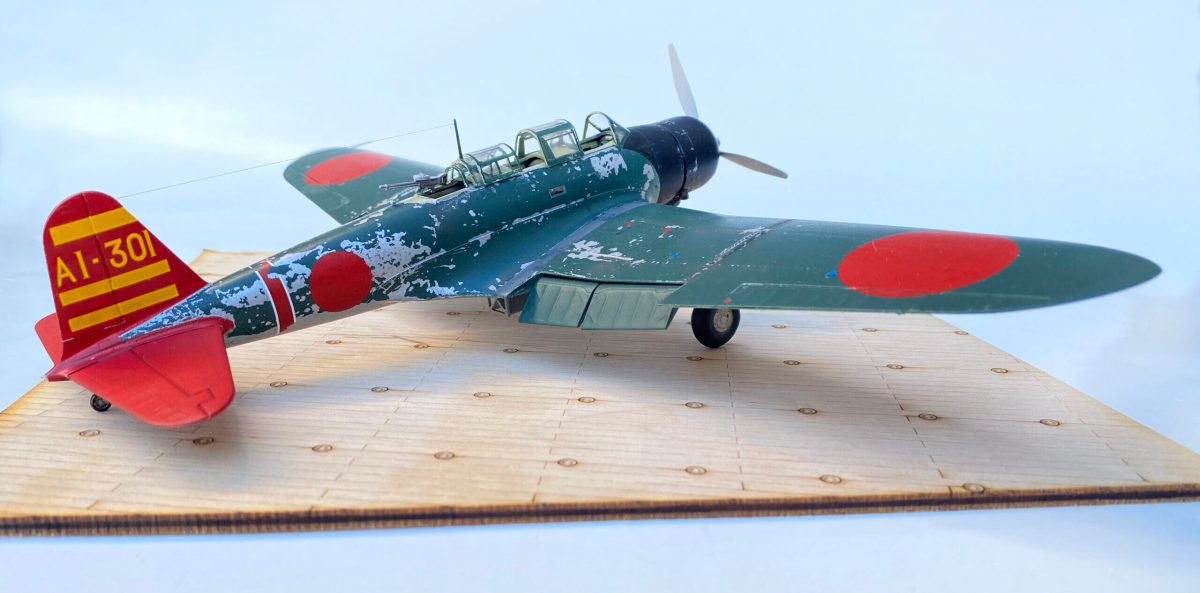
Photos from the time show that many carrier-based aircraft had a fair amount of chipping and wear. Images of what is purported to be Fuchida’s Kate show the camouflage, hastily applied without primer, flaking off from exposure to the harsh weather at sea. There are a couple of ways to replicate the chipped effect. One is to spray common hairspray over the natural metal color, let it dry, and then paint the dark green color over it. There are also a number of “chipping fluids” on the market that you can brush or spray on in much the same way. Once you’ve applied the chipping solution and dark green camouflage, use a toothpick and an old toothbrush to chip away at the camouflage color. Wet the toothbrush and start scrubbing the various seams and panels to remove the green paint in much the same way as the harsh weather did to the real thing.
Take your time and experiment first before going all in on the model. It is a bit of an artistic technique. Once you’re satisfied with the look, set aside the aircraft to dry thoroughly.
Next, spray a light gloss varnish to prepare the model for the decals. Markings are a very simple affair. A large Hinomaru (the classic large red disc) appears in six positions: on the top and bottom of the wings and on both sides of the fuselage. Paint the tail red with three broad yellow stripes on the rudder along with the code “AI-103,” which signifies that this is the commander’s airplane from the wing aboard the aircraft carrier Akagi. A coat of a dull varnish seals the decals.
Assemble the landing gear next and paint the tires a black rubber color. The gear struts and landing gear doors should be a natural metal aluminum. Add some mild weathering and oil and fuel stains. Keep the weathering to a minimum; mechanics would have taken excellent care of their aircraft on the long voyage across the Pacific.
The kit gives the modeler a choice of a one-piece canopy that can be closed or kept open to show off that detailed interior. The clear pieces are thin, so be careful not to crack the plastic. Invest in a set of precut adhesive masks for the canopy. You can find a number of brands at reasonable prices. Pick one that is designed specifically to be used with a Hasegawa kit. Mask off the different canopy pieces and paint them the same dark green as the rest of the aircraft. Let the pieces dry thoroughly before removing the masks. Pay close attention to the four canopy pieces at the rear of the cockpit and how they will fit together when slid open to expose the rear-firing machine gun. Finally, attach the propeller, which should be painted natural aluminum; the pitot tube on the leading edge of the port wing; and the antenna that sits on the top of the canopy.
With everything in place, Commander Fuchida’s Kate is ready to take its spot on the display shelf along with the rest of your collection of aircraft from that fateful December morning.