Kits of Grumman’s F8F Bearcat have been produced in all the popular sizes, but the 1/48th scale versions have recently become more difficult to find on hobby shop shelves. Hobbycraft’s kit (HC-1442) is the easiest to locate and most reasonably priced, usually selling for just over $25. Hobbycraft’s offering is also well suited to beginners.
Construction starts with the five-piece cockpit, which should be painted interior green, FS-34151, not zinc chromate as indicated on the instructions. The cockpit will benefit from the addition of Eduard’s prepainted, etched-metal detail set (EDU-48301), which includes a realistic instrument panel in addition to convincing pilot’s seat belts.
When the cockpit is complete, set it aside and determine how you will arm your Bearcat. Drill out the appropriate “flashed-over” holes in the bottom wing section—the holes where you’ll later attach high-velocity aircraft rocket (HVAR) and bomb pylons. Drill out holes for the centerline tank attachment point, too. You’ll also need to drill out the holes in the upper wing sections to accommodate the locating pins for the 20mm wing cannon blisters. Attach the four tiny blisters to the outside of the wing by dabbing a little cement on the pins protruding from the inside of the wing. Before cementing the wing sections together, glue the box-shaped mock-up of the bottom of the engine compartment into the bottom wing center section. This part is molded to appear like the bottom of the engine compartment and serves to block the view of the interior of the fuselage. Paint it interior green, along with the wheel wells.
Next glue the top and bottom wing parts together and set aside to dry. Cement the completed cockpit into one of the fuselage sides. Then carefully glue the turtle deck, located behind the pilot’s armored partition, into place at the rear of the cockpit opening. The instrument panel can also be glued into place at this point. Align all the interior fuselage parts, then close the two sections around them. You may need to use a few pieces of tape to hold the fuselage together while the cement dries.
Paint the Pratt & Whitney R-2800-34W Double Wasp engine steel and then dry-brush the cylinders with black, to bring out the details. Next paint the crankcase cover light aircraft gray, FS-16473, and dry brush it with silver to show wear. Set the engine aside to dry.

Now glue the wings and horizontal stabilizers to the fuselage along with the rudder section that slips into the slot in the top of the vertical stabilizer’s base. Basic construction of the model is now complete. Check over all the seams, sanding and filling where necessary. Then spray on a light coat of light gray primer to highlight any areas that may need attention.
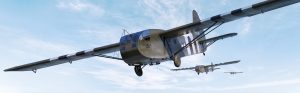
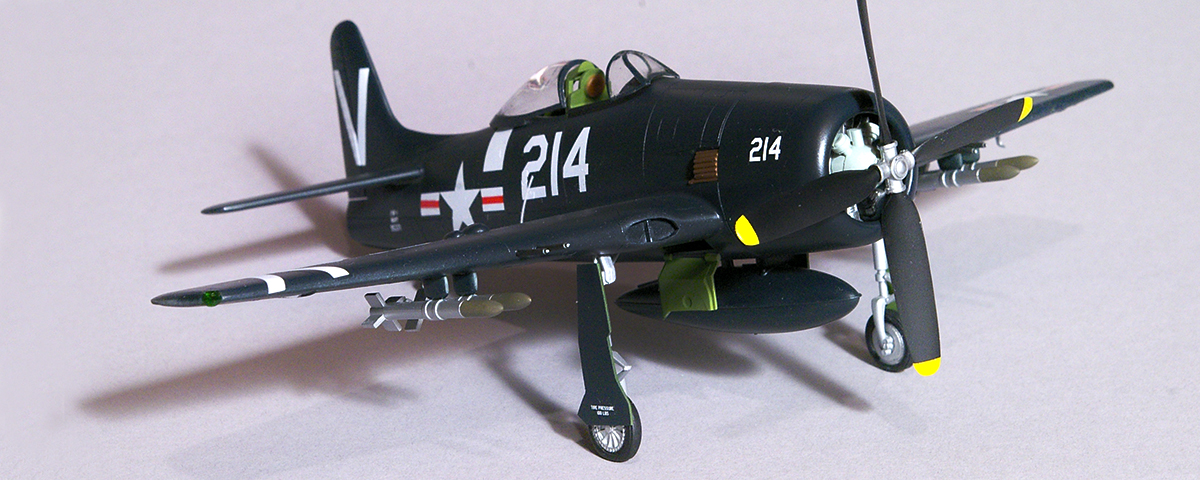
>Most postwar U.S. Navy Bearcats were painted overall glossy dark sea blue, FS-15042. Once you’ve finished painting your model, attach the engine and cowling to the fuselage. Paint the landing gear legs “platinum mist” and the tires flat black. Then glue the completed undercarriage into the wheel wells.
Bearcats were interceptors that were also used in the ground attack role. The kit comes with four HVAR and two 500-pound bombs. Attach the weapons to the underside of the wings by pushing the locating pins, on the bottom of the pylons, into the holes you drilled earlier.
The Bearcat shown above is armed with four rockets that have silver bodies and fins and olive drab warheads. I chose to use markings from SuperScale’s decal sheet 48-1082, replicating an F8F-1B from VF-12A that served on USS Valley Forge in 1948.