The whole city is a monument—a testament to the will of the people of London to survive a dark time, carry on, and ultimately, take the battle back to and overcome the enemy
On August 24, 1940, at the height of the Battle of Britain, two German bombers, acting without orders, dropped their loads over the city of London. The Royal Air Force retaliated the next night with a strike on the Nazi capital, and Hitler, in a fit of pique, declared that London would be subjected to the full wrath of the German Luftwaffe. Over the next two months, beginning on September 7, an average of 165 bombers dropped 200 tons of bombs on the city each day. Raids continued regularly until May 1941, when the Eastern Front and Operation Barbarossa diverted Hitler’s attention. By then, nearly a third of the city had been devastated and some 16,000 Londoners killed in what became known to many as simply “the Blitz.”
Londoners of today who lived through the Blitz can see evidence of it everywhere: in block after block of rebuilt buildings, some of them brilliant restorations, others obvious replacements. To the visitor interested in that dark time in London’s history, the signs of devastation are less recognizable. But a walk through central London can still reveal the scars of those days; you just need to know where to look.
The Imperial War Museum is a good place to familiarize yourself with the story of London during the Blitz. The IWM is actually a series of five museums, but the outwardly drab main building, on the south side of the river Thames, is where we’re headed. “The Blitz Experience,” an interactive exhibit in the museum’s World War II gallery, helps summon a feel for the time—albeit one without the stark terror. A guide, taking on the role of an air raid warden, escorts our small group of visitors from an air raid shelter through a bombed-out London street. He warns us of the dangers of unexploded bombs and ruptured gas lines. As we pass a truck set up to provide rescue workers and the public with a “spot of tea,” our guide is keen to remind us that a portion of the provisions come courtesy of the United States, despite that country’s then-neutral stance.
The “experience” is akin to negotiating a full-sized diorama complete with the noise of rescue and the drone of approaching bombers. It’s dark and hard to see at times but you do get a sense of the chaos created by the nighttime raids, and of what life in London was like during the Blitz.
For a more elite view of wartime London, we’ll next head to the Cabinet War Rooms, where Churchill and his War Cabinet met. The underground warren of mostly small, cramped rooms is located on the opposite side of the Thames from the Imperial War Museum, under what is now the Treasury Building, and is a quick walk from the Houses of Parliament and Westminster Abbey.
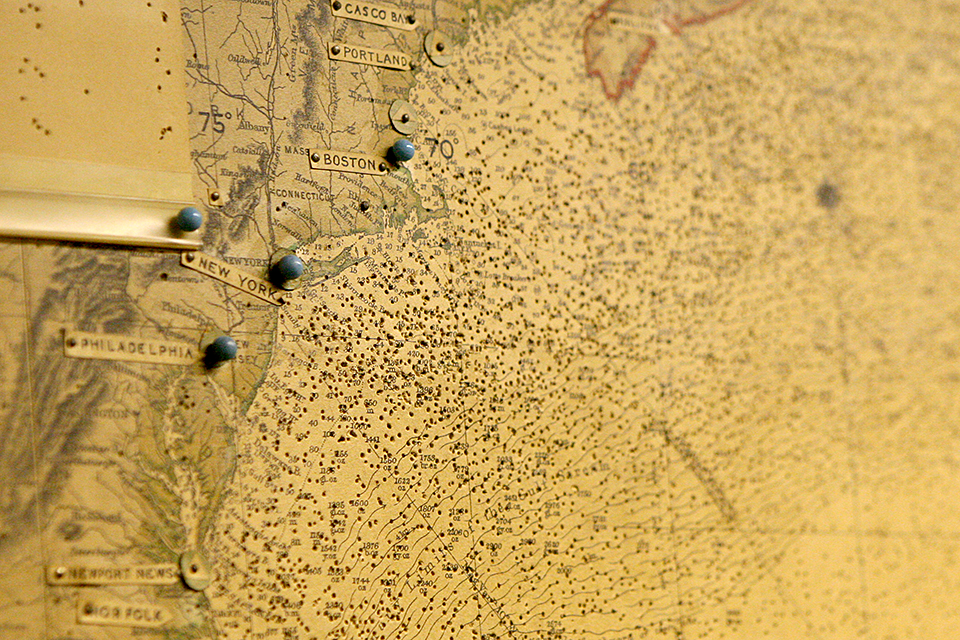
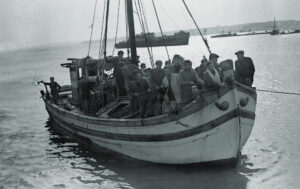
The entrance, while not original to the war, has the look of a sandbagged bunker, and leads to the complex of rooms where some 115 meetings of the War Cabinet were held over the course of the war. The smell of Churchill’s cigars may be gone but the rooms are preserved as if he had just left and it is September 1940 all over again. I find the Map Room the most moving. A huge map covers one wall: look closely and you’ll see a swath of thousands of tiny holes making a big, arcing shape across the Atlantic Ocean, the result of the pushpins that had once been used to carefully track the hundreds of convoys that were Great Britain’s logistical lifeline.
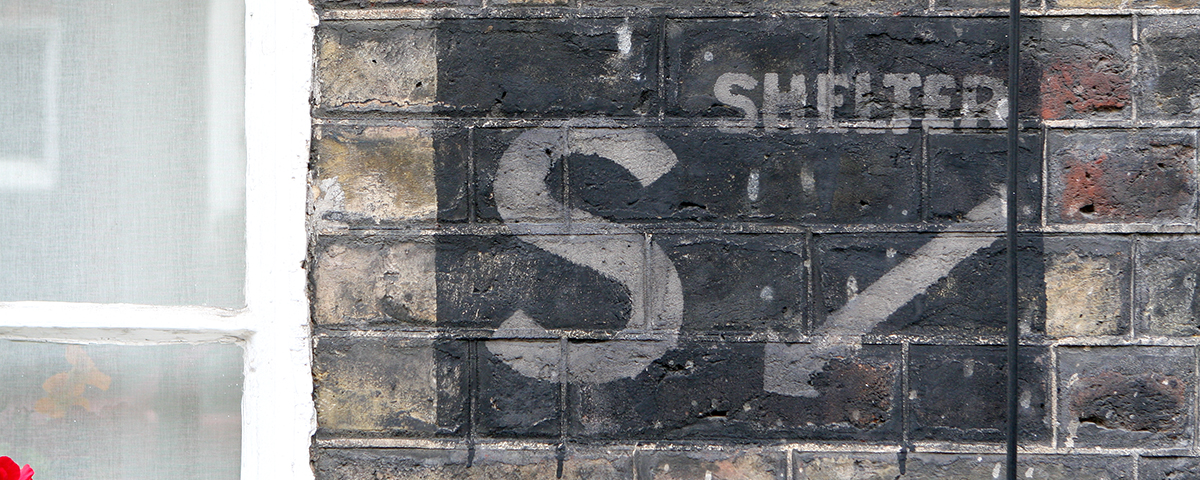
A few blocks south, on Lord North Street, another striking visual representation of the period is all the more affecting because of its location: a nondescript brick wall on a nondescript side street. There you can still see a large S stenciled on the wall, with an arrow directing citizens to one of the many air raid shelters the city once held. Farther down the street, another sign painted on a wall shows the location of a vault under the pavement where Londoners could wait out an air raid. Keep your eyes open, and you’ll spot more of these throughout the city.
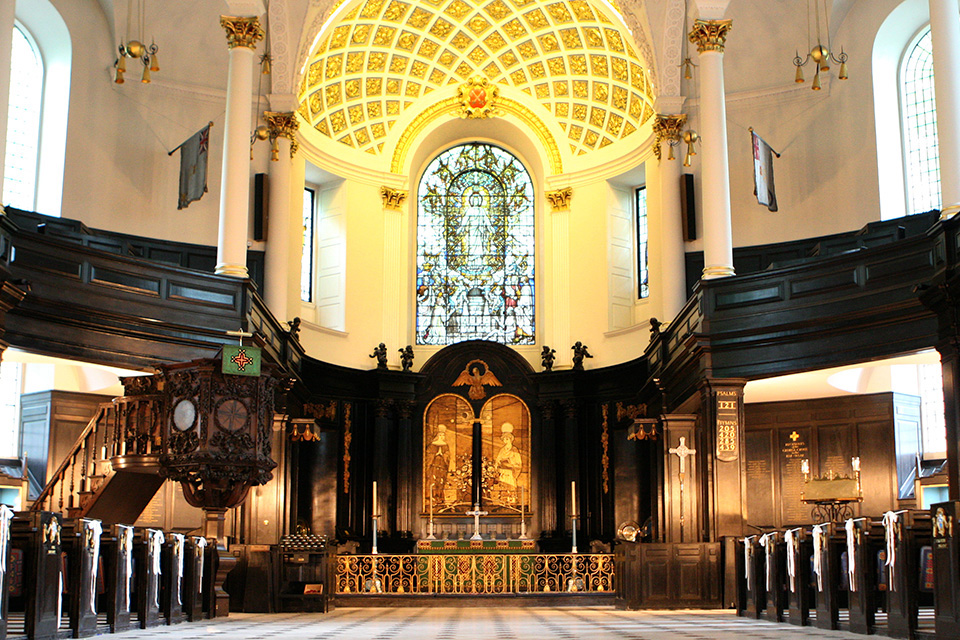
We encounter other eloquent walls north of there, where the Strand, the famous grand avenue that stretches from Trafalgar Square, turns into Fleet Street. There, in the middle of the avenue, sits the church of St. Clement Danes. The church and the site have a history with London’s Danish community that dates back to the late 800s. The English Renaissance–style building, designed by famed architect Christopher Wren and built in 1681, is the third church on the site. And it was on the night of May 10, 1941—the last attack of the Blitz, and generally considered the worst—that it was eviscerated by German bombs. It has since been rebuilt and is the RAF’s official chapel, but its walls still bear deep scars of the attack.
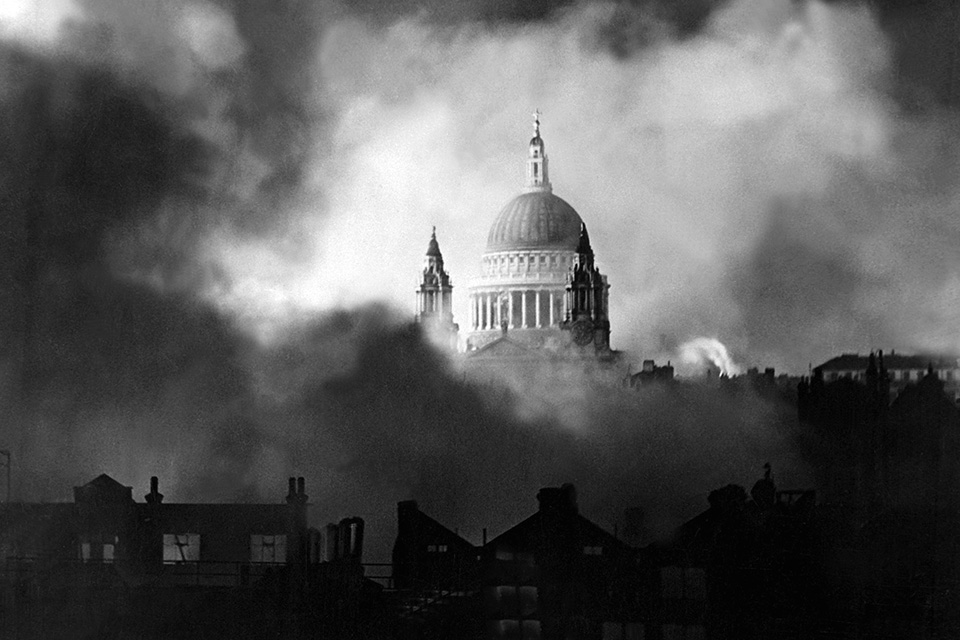
Other churches didn’t fare as well. In the shadow of St. Paul’s Cathedral—a symbol of British defiance ever since it was photographed during the Blitz, its dome gleaming resolutely amid black clouds of smoke—is Christ Church Greyfriars. Another of Wren’s designs, it is now a gutted ruin. Only a rough section of stone wall remains, bearing a steeple restored in 1960. Hedged rosebushes grow where pews once stood, a vivid reminder of the fate that grand St. Paul’s could have met.

These stark walls are one kind of monument; another lies along the embankment on the north side of the Thames. The striking Battle of Britain Monument, a low set of walls, features a stunning bas-relief brass sculpture depicting scenes of the Blitz and RAF aircrews scrambling for their planes. Plaques bear the names of the hundreds of pilots and crewmen who gave their lives during the battle. The list includes the Czech and Polish pilots who flew for Britain and were critical in the air that summer; a plaque in a lower corner lists the nine Americans who joined the fight. London is full of such memorials, but to me the whole city is a monument—a testament to the will of the people of London to survive a dark time, carry on, and ultimately, take the battle back to and overcome the enemy.
By now your feet are surely tired, and it’s time to do what many a Londoner—and even a visiting American airman or two—did after a raid: seek out a pub for a pint and a hearty meal. There are thousands of pubs to choose from; we’re headed for one at the end of a small alley called Rose Street, in a vibrant part of town in the heart of London called Covent Garden. A sign inside the Lamb and Flag proudly tells us the pub has been in constant operation (barring the midst of an air raid, I suppose) since it was established during Elizabeth I’s reign.
Guys in crisp blue RAF uniforms surely had a pint here, I think, as I gaze around this building that looks like it’s been here forever—and before them, tommies in tin hats, and long, long before them, men in buckled shoes and ruffled shirts. Where better to reflect on one powerful part of a great city’s long story than in a building that looks like it’s seen every chapter?
When You Go
Many of these central London sites are within walking distance of each other; London’s legendary Underground is an excellent way to navigate the longer distances. An Oyster card makes paying for that travel easier and more affordable; you can buy the card with a preset value, or add to the amount as required. They are available at Underground station ticket offices, by phone (44 0845 330 9876), or online (oyster.tfl.gov.uk/oyster/entry.do).
What Else to See
The Imperial War Museum’s main building, IWM London (london.iwm.org.uk), can easily absorb a day or more of your time, and is well worth it. The building was once home to Bethlem Royal Hospital—the infamous asylum more commonly known as Bedlam. Enter the airy main lobby and you’ll immediately encounter, among other relics from Britain’s 20th- and 21st-century conflicts, a Sherman tank, a battle-damaged German Panther tank, and a V-2 rocket, while overhead, a Spitfire that saw action in the Battle of Britain is frozen in flight along with a P-51 Mustang, Fw 190, and a V-1 flying bomb. Take a look at the Home Front section of the World War II gallery for more on life in London during the Blitz, and don’t miss the Morrison indoor bomb shelter—essentially a wire box with a reinforced steel frame just barely big enough to hold several adults lying down. More than 500,000 were distributed free during the war. Museum admission is free, although a fee is charged for some special exhibitions.
This article originally appeared in the January/February 2010 issue of World War II magazine.