Kits for the Boeing Vertol CH-46 Sea Knight aren’t generally found on hobby shop shelves, but regularly show up online and at model swap meets. One of the easiest to find is the 1/72nd-scale Hobby Boss kit, number 87723. Though it’s simple to construct, it includes a detailed cockpit with controls for both pilots, instrument panels above and in front of the flight crew and nicely molded pilots’ seats. The only real drawback is the bench-style seats in the cargo area, which should have replicated fold-ups with canvas backs and bottoms.
Start by painting the cavernous cargo area walls in a shade very close to air mobility gray, FS-36173. The cockpit sidewalls and floor of the cargo area should be painted engine gray, FS-36076. Paint the flight crew seat frames air mobility gray, with olive drab seat cushions made from plastic strip and detailed with etched-metal seat belts from the Airwaves set, AC-72-83. Next paint the belts sand, FS-33531, with silver buckles. The seats of the cargo hold should be olive drab, FS-34087. You can also use belts from the Airwaves set in the cargo bay, to hold crates and boxes secure.
The cockpit will stand out when the glazing is fitted, but the cargo hold is a “black hole” in the closed fuselage. When the cargo bay is not configured for carrying troops, it can be loaded with 55-gallon fuel drums, equipment crates and ammunition boxes—resin-cast accessories easily purchased online from a specialty hobbyist such as valuegeardetails.com.
Before closing the fuselage sides, be sure to securely glue the porthole windows into position, cement the nose gear leg into place and position the shafts that will eventually hold the rotors. With the fuselage closed, glue the topside transmission cover and engine intake spikes to the top of the fuselage, then set these assemblies aside to dry. While the fuselage parts are drying, paint the rotor heads engine gray and the six blades flat black, FS-37038. When those parts are dry, assemble the heads and dry-fit the blades into the slots on the head ends. If you’ve attached the blades correctly, they’ll display their customary “droop” when at rest.
Now back to the fuselage assembly, where the long seam on the underside of the fuselage will need to be filled and sanded. Since these pieces are pressed from thin plastic, they tend to flex with handling, and the seam may have to be filled twice. Once the fuselage construction is complete, tackle masking the cockpit glazing. This is a tedious job, as there are many clear areas, and some of the outlines of the window supports are poorly cast. There doesn’t seem to be another way to accomplish this task except for using thin strips of masking tape burnished in place with the flattened end of a toothpick.
Attach the masked cockpit greenhouse with Deluxe Glue ’n’ Glaze, a stronger version of common white glue that dries crystal clear. Note that the fit of the glazing could be better, so you might have to do some filling and sanding around seams. Once all the seams are filled and sanded, spray a coat of Alclad II primer and micro-filler on the model. Lightly wet sand the entire model overall, then wash off the residue and let air dry.
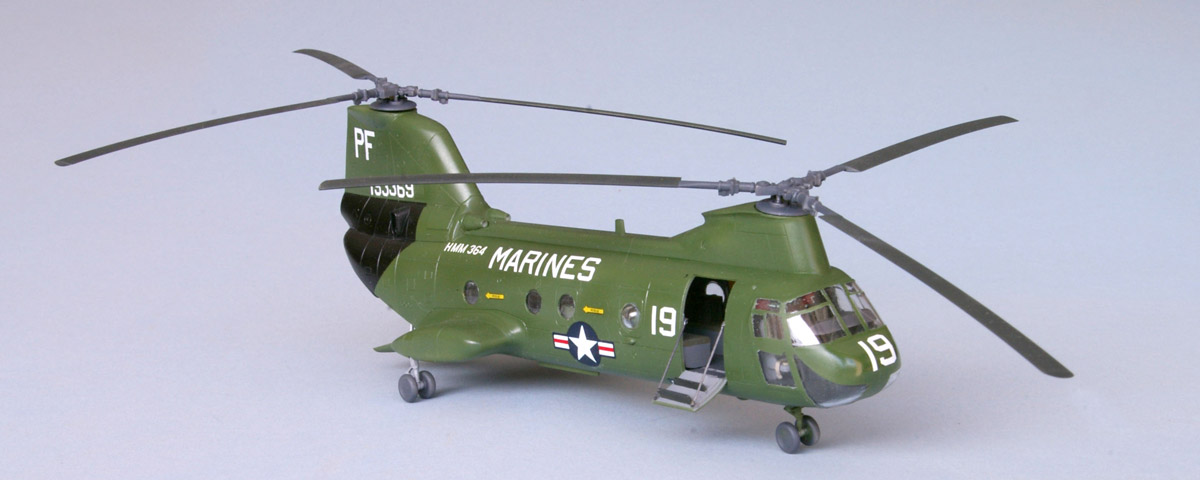
During the Vietnam War, U.S. Marine Corps helicopters were painted overall Marine field green, FS34095. After the color coat has cured, spray a gloss clear coat over your model to provide a smooth surface for decals. I found the white letters and numbers for CH-46 Bu.No. 153369, a Vietnam veteran from HMM-364, on various Micro Scale and Super Scale decal sheets.
Once the decals have dried, apply a coat of dulling spray overall. A mist of Tamiya’s smoke on the panel lines will replicate the wear resulting from the years of hard use that the “Battle Phrog” endured on the battlefields of Southeast Asia.