
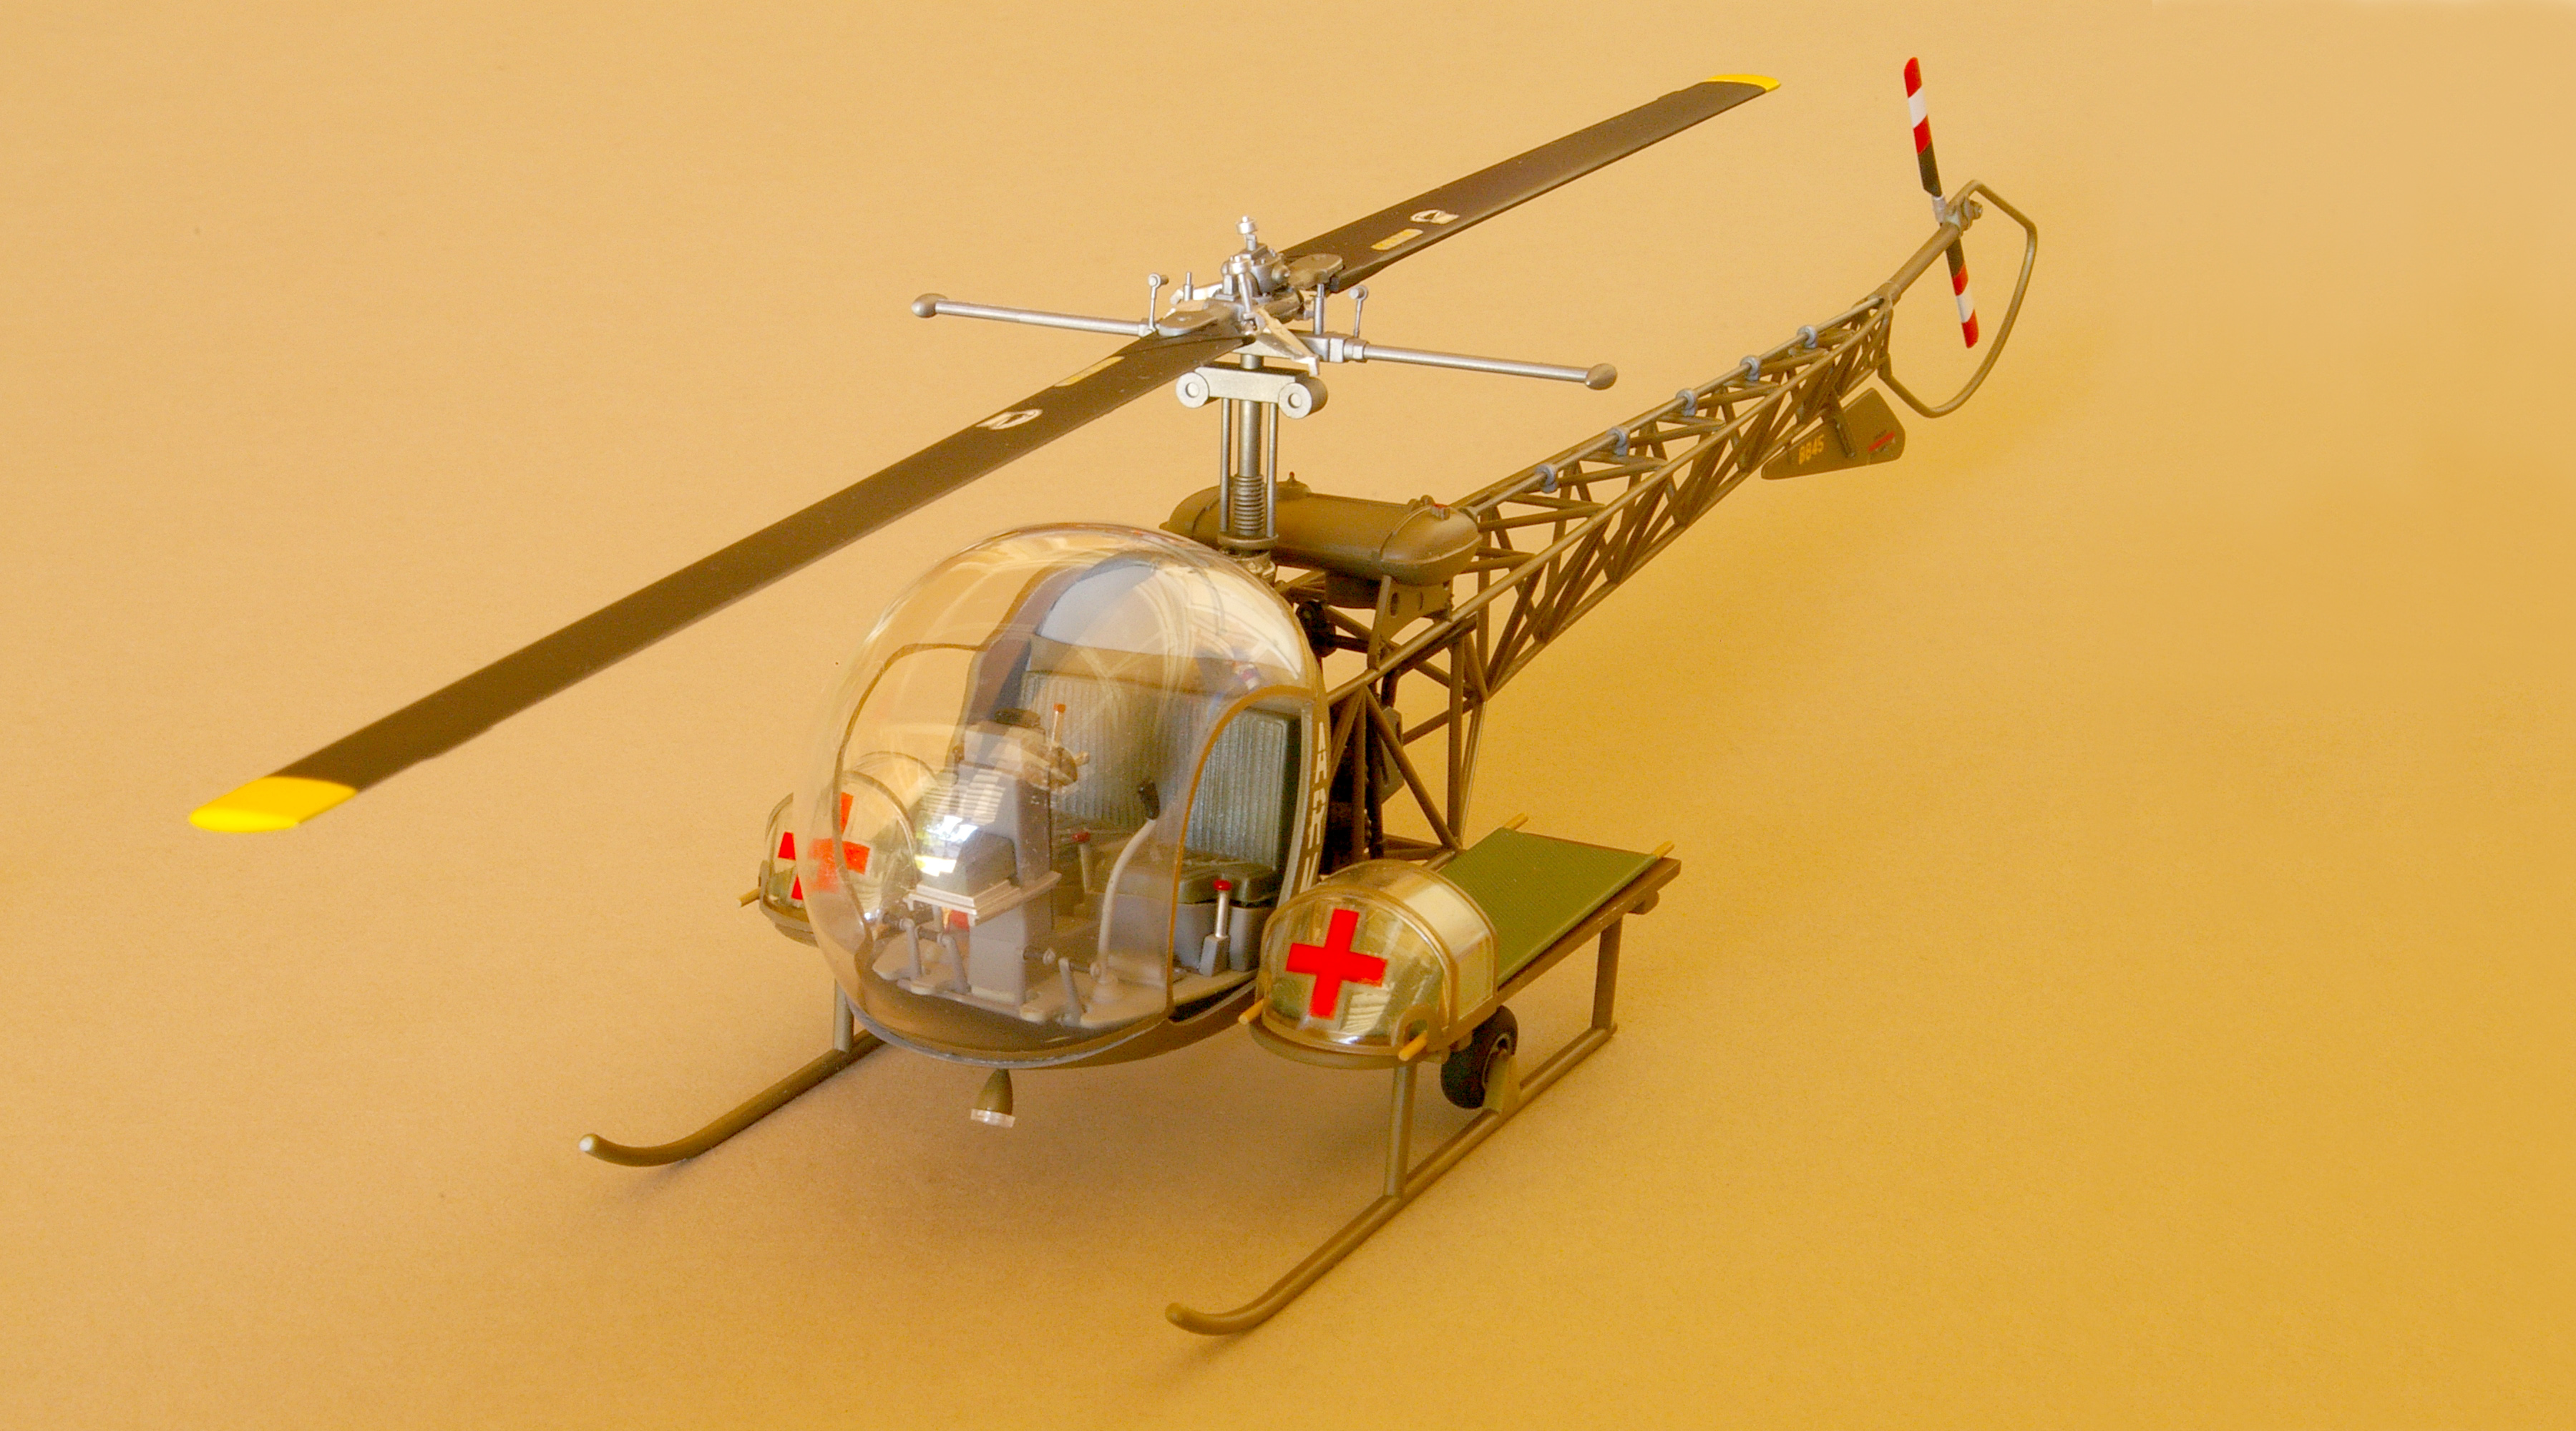
To faithful viewers, the helicopter that swooped in with wounded GIs in Korea was known as a M*A*S*H chopper. The military’s official designation was the Bell H-13/HTL-4 Sioux. No matter what it was called, this aircraft carved out a distinguished military service record and also became the first helicopter to be licensed for civilian use. Our model project is the H-13G version that proved crucially important in evacuating wounded to the Mobile Army Surgical Hospitals in Korea. Molded in 1/35th scale, This kit was originally released in 1993 by MRC (Model Rectifier Corporation) before being picked up by Revell.
Construction starts with building the Lycoming TVO-435-F1A 6-cylinder engine. The engine block should be painted “metallic dark anodic gray,” highlighted by a dry-brushing of silver. The cooling fan shroud needs to be gloss black (FS-17031), with the exhaust pipes sprayed “burnt iron.”
Tackle the cockpit next. The floor and walls of the cockpit area should be “dark gull gray” (FS-36321). The bench-type seat should be brushed with khaki green, with the seatbelts picked out in light gray. The instrument panel is gloss black, but the dial faces should be carefully painted white, with red and silver dots for switches.
Next assemble the tubular tail boom section. This area must be glued together square. To assure correct symmetry, cement the boom sections together on a piece of graph paper. Because this completed subassembly is so fragile, handle it with great care. When the glue has dried solidly, spray the entire boom with “olive drab” (FS-34087), then carefully maneuver the completed engine assembly into the maze of tubes in the forward section of the boom and glue it in place. Note that this part of the project is difficult and will take plenty of patience.
Be sure the engine is located precisely on the very bottom of the tubular structure behind the cockpit. With the engine correctly placed, glue the forward tips of the tail boom into the holes provided in the back wall and bottom of the cockpit. Again, patience is the word.
Next assemble the landing skids and paint them olive drab. The wheels should be sprayed “tire black” and attached to the skids. Since our model will replicate a medical evacuation helicopter, paint the stretchers “field green” (FS-34097) and the handles “wood.” Once that’s done, set these aside.
Another mini-model in this kit is the main rotor, which includes 14 pieces. The blades should be painted “aircraft interior black” (FS-37031), with the rest of the rotor assembly sprayed “steel.” A few of the very tiny ancillary rotor pieces can be brushed in silver to add interest. The tail rotor blade needs to be painted in a series of red and white stripes. The final construction task is to mask and paint the frames of the large plastic bubble that encloses the cockpit and the clear protective hoods over the stretchers. Don’t forget to place the Red Cross decals on the stretcher hoods after the frames have dried.
Attach the hoods to the stretchers and then place them on the outriggers extending from the skids. Your M*A*S*H helicopter is now ready for display.
This feature appeared in the January 2007 issue of Aviation History. Click here to subscribe today!