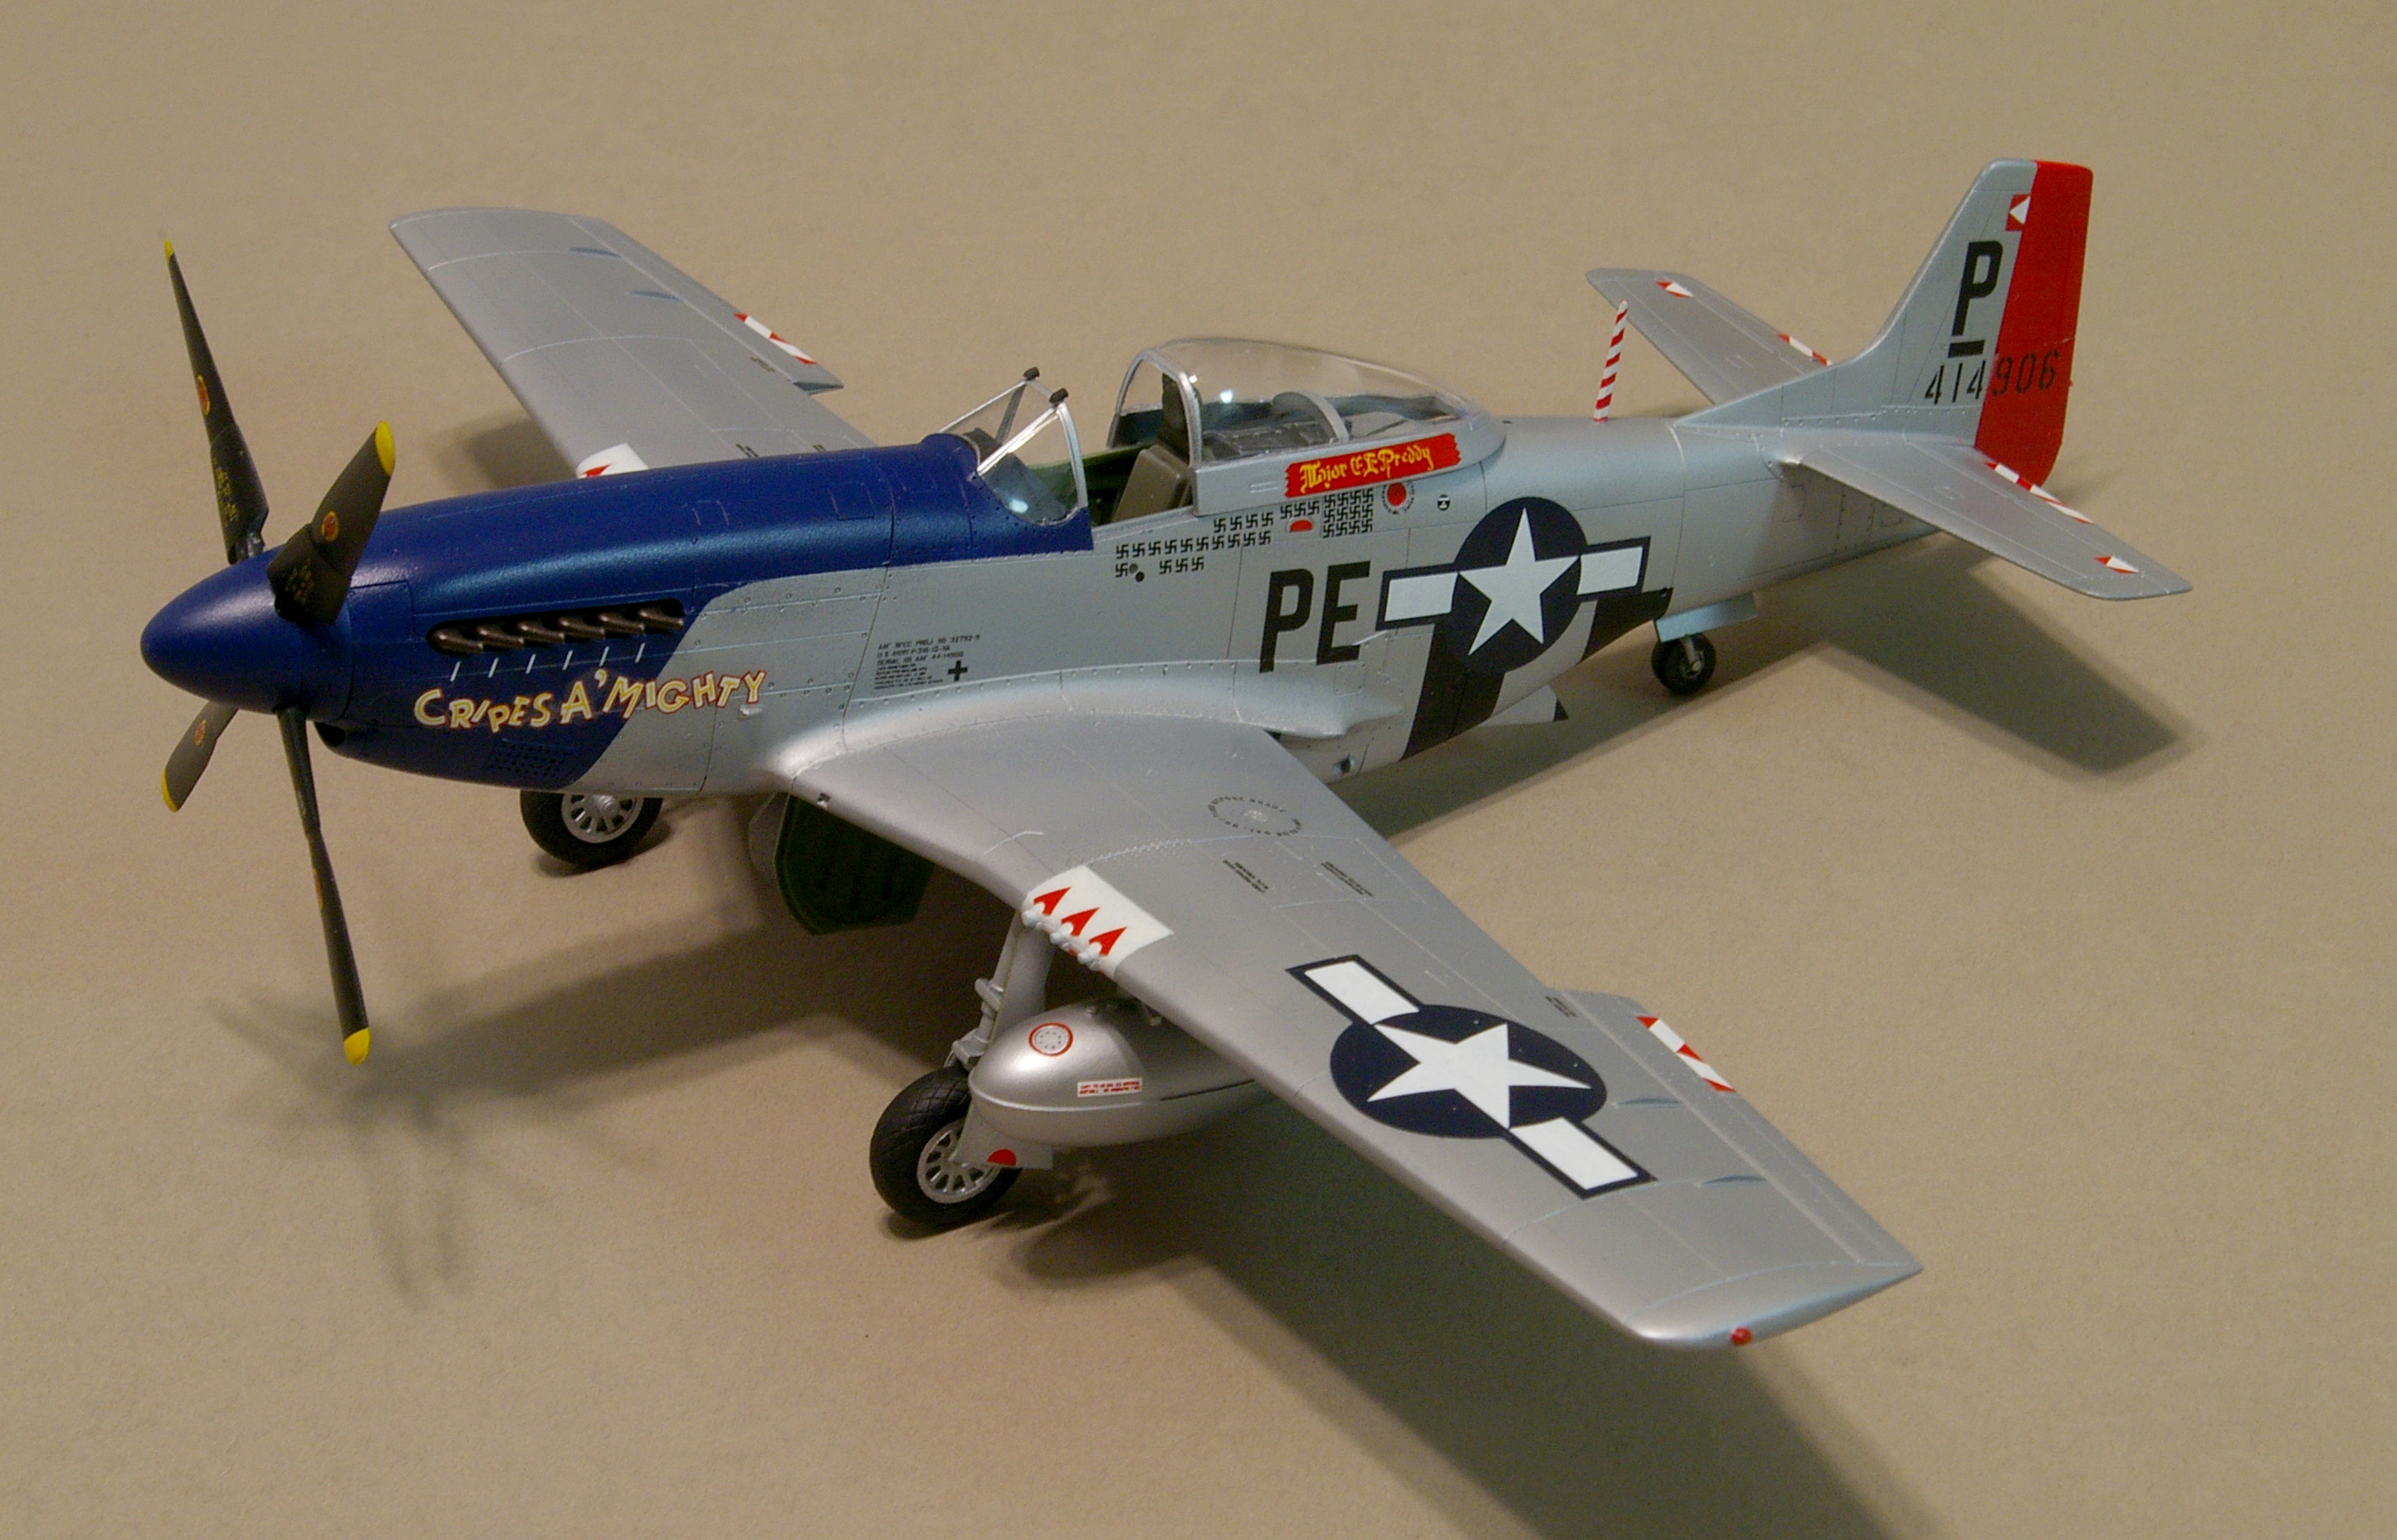
The most colorful of Major George Preddy’s North American P-51 fighters was his last and, unfortunately, the one he was shot down in on December 25, 1944. That Mustang was a late “D” model that featured the tail “fin fillet” modification. Any of the 1/48th scale kits from Tamiya, Hasegawa or Fujimi, which have that modification, are appropriate for this project.
If you are using the Tamiya kit, start by painting the cockpit sidewalls interior green, FS-34151. Pick out a few of the boxes with olive drab, FS-34087, or flat black, FS-37081, to break up the solid color. A few dots of red, white and silver will add detail to this area. The cockpit floors of P-51s were constructed from plywood, and you can use light tan streaked with brown to simulate the wood grain.
The radio compartment, behind the seat, should be flat black and then dry brushed with light gray. Finish the cockpit by painting the instrument panel semigloss black and the seat cushion olive drab; fabricate a pilot’s harness with thin paper strips dipped in dirty thinner to simulate wear. The radiator, part A7, should first be painted silver and then glued in place on the underside of the radio compartment. Set this subassembly aside to dry.
The wing-to-fuselage joint almost always leaves a difficult seam to fill when building model aircraft kits. This problem is all but alleviated by first carefully fitting and then cementing the top portions of the wings to the fuselage. Hold off on attaching the bottom wing section until later.
With the top wings in place, glue the horizontal stabilizers into position and then close the fuselage sides. Turn the model upside down and gently slip the completed cockpit assembly into position. It should click into place. Turn the model over and check that the cockpit sits square and the horizontal stabilizers are at right angles to the vertical fin. Secure the cockpit with a few dots of cement to hold it in place.
Major Preddy’s P-51 is often shown with long-range drop tanks under the wings. Drill out the corresponding holes in the bottom wing section and attach the tank mounts using dabs of glue on the inside of the wing. Fit the main wheel bay into place and slip the bottom wing into position. It should snap into place with just a small amount of friendly persuasion.
Late-war P-51s were generally delivered in their natural metal finish. Duplicating this surface requires that all seams are carefully filled, sanded and polished to a mirrorlike finish to remove any scratches in the plastic. A good primer or undercoat is Alclad II’s gray primer and microfiller. This is a lacquer-based product that is sprayed on and must be used in an area with plenty of ventilation.
Spray several light coats of primer over the model, sanding lightly between each coat with 600-grade wet and dry paper. (This sandpaper can be found at auto supply stores.) In real life, the wings of P-51s were painted with silver lacquer. This can be duplicated by using Alclad II’s flat aluminum. The rest of the model can be decked out in shades of Alclad’s white aluminum and bright aluminum. (Alclad products are lacquer-based and cannot be brushed onto plastic.)
Major Preddy’s aircraft’s distinctive nose color has been identified as USAAC Blue 23. Floquil’s 303275 is a close color match. To duplicate the curve of the blue area on the nose, follow the painting instructions on Eagle Strike Productions’ decal sheet IP-4808, “Blue Nose Birds of Bodney, Part 2.” Mask this area with pieces of tape cut using a “French curve” template from an art supply store.
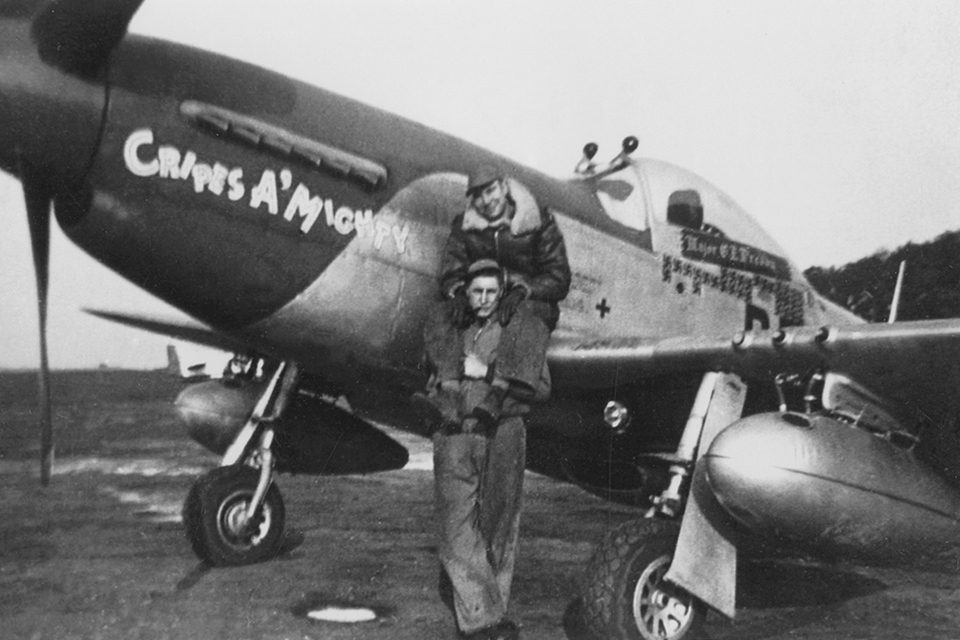
Undercoat the rudder with gloss white before painting it bright red. Use the same white for the ailerons, trim tabs and the areas around the machine guns on the wing leading edges. Follow the instructions on the decal sheet for the ailerons; the trim tab decal placement is similar but different. Seal the markings with a coat of Testors glosscoat. Preddy’s ground crew pose in front of the ace’s last “Cripes A’ Mighty.” (National Archives)
The final details to be added to Major Preddy’s aircraft are the dual mirrors that were mounted above the windscreen. They are not in the kit but can be made by cutting 1⁄2mm lengths of .035-inch styrene rod from Evergreen Scale Models. The rods should be sanded into shape, painted flat black and attached to the top of the windscreen with white glue.
Your model of Major George Preddy’s P-51D as it appeared just before his last mission on Christmas Day 1944 is ready for display.