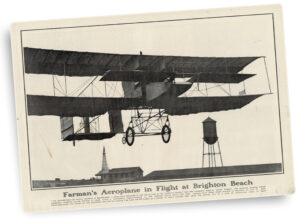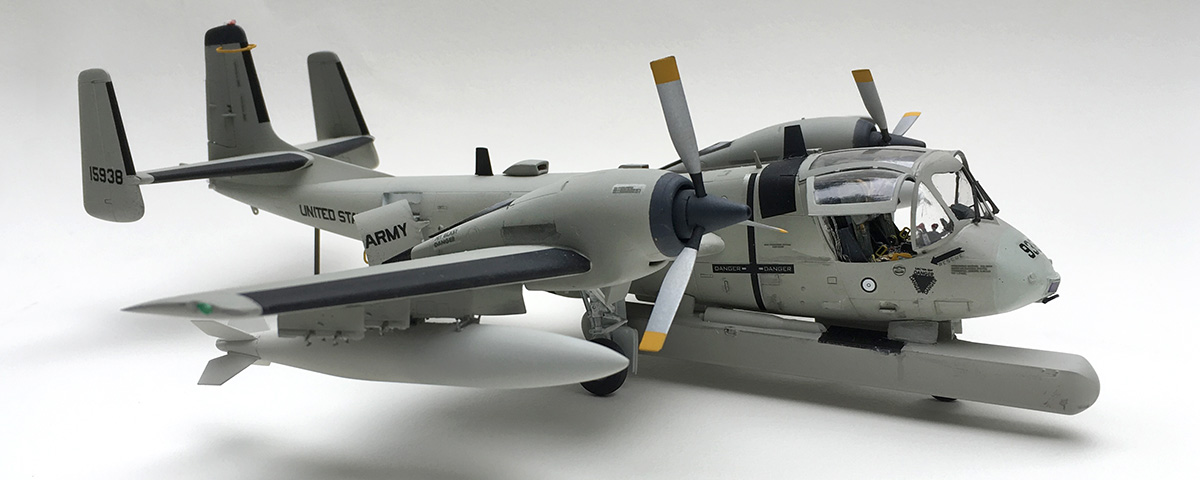
Modelers can choose from two kits of the Grumman OV-1D, one in 1/72nd scale by Hasegawa of Japan and a second, in 1/48th scale, by Roden from Ukraine. Roden also produces the earlier OV-1A and OV-1B/C kits, both of which are not meant for beginners. Roden’s 1/48th-scale “D” offering starts with building the cockpit, which will be visible through the model’s bubble canopy.
The two Martin-Baker J5D ejection seats are made up of 10 individual pieces. Since these seats are substantial, it’s worth spending extra time painting them various shades of dark green, flat black and olive drab. The overall cockpit floor and walls are flat light gull gray, FS-36440. The pilot’s instrument panel is molded in clear plastic, with a reverse-printed decal that gets positioned on the back of the piece.
The electronics reconnaissance officer’s instrument cluster is dominated by a large scope, molded in clear plastic. You can duplicate an active screen by painting its back medium green, or paint it black (the scope would most likely be inoperative when the aircraft is on the ground). The rest of the cockpit is accurately reproduced, complete with a tiny fire extinguisher—to be painted red—positioned on the rear wall of the crew compartment.
Next tackle several subassemblies of the fuselage and wings. Glue together the exhaust ports of the Lycoming T53-701 turboprops. Then assemble the horizontal stabilizers along with the vertical tail parts, to complete the tri-tailed empennage. Cement together the top and bottom wing pieces, and glue the engine cowlings into place. Since this kit includes parts for earlier models, be sure to select the correct version pieces. Take extra care when attaching the wingtip panels.
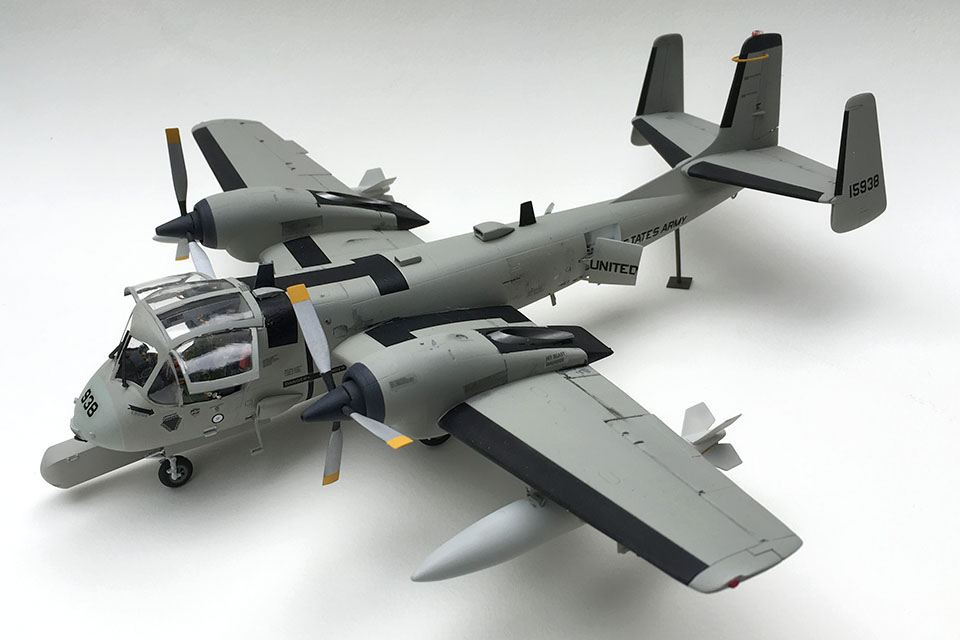
Optional extended range fuel tanks are also provided in the kit. These should be painted the same colors as the rest of the aircraft, but adding a little white to the gray will give some contrast to your model’s overall monotone scheme. There are two versions of the SLAR (side-looking airborne radar) pod, mounted on the fuselage’s starboard side. The larger of the two in the kit (parts 5E and 11E) is correct for the D model. Before assembling the SLAR, glue as many BBs as possible in the front of the pod to help keep the model from becoming a “tail sitter.” Assemble the pod and follow the instructions to attach it to the fuselage. Note that getting the SLAR to sit parallel to the ground is the most difficult part of building this model.
With the subassemblies complete, attach the wings, the empennage and the landing gear with its many doors. The fuselage nose section is molded in clear plastic to accommodate a forward-looking electronics package “eye.” Paint the inside of the eye, and then add as many BBs as possible to this part to ensure your model has a realistic stance. Before cementing the fuselage parts together, pack more weight into the area under the cockpit floor between the nose gear bay and the fuselage sides (if all this added weight doesn’t keep your Mohawk on its tricycle gear, the answer may be a scratch-built tail stand).
Paint the fuselage light gull gray overall. The anti-icing panels on the leading edge of the wings and on the vertical and horizontal tail surfaces should be masked and painted flat black. The propellers are flat aluminum tipped with yellow. Complete your model by attaching the canopy parts with white glue and applying the markings.