
The North American B-25 Mitchell served in nearly every theater of operations during World War II. While the ionic medium bomber was continuously modified and redesigned for a wide variety of roles, some of the most famous B-25s were among the earliest produced. The 16 B-25Bs that launched from the deck of the carrier USS Hornet for their “Thirty Seconds Over Tokyo” were fresh off the assembly line in 1940.
A retooled Masterpiece
Airfix totally retooled their 1/72nd-scale B-25 in 2018. The kit that emerged was designed from the outset to be built in a number of versions. In 2019 the company released their newest version, which could be built as one of those 16 famous “Doolittle Raiders.”
The kit has nice detail and is well engineered. The instructions are clear and easy to follow. An extra parts tree is included with pieces particular to the Raiders: an M7 cluster incendiary bomb, the clear tail cone with holes for two dummy machine guns and the substitute “Mark Twain” bombsight.
Getting Started
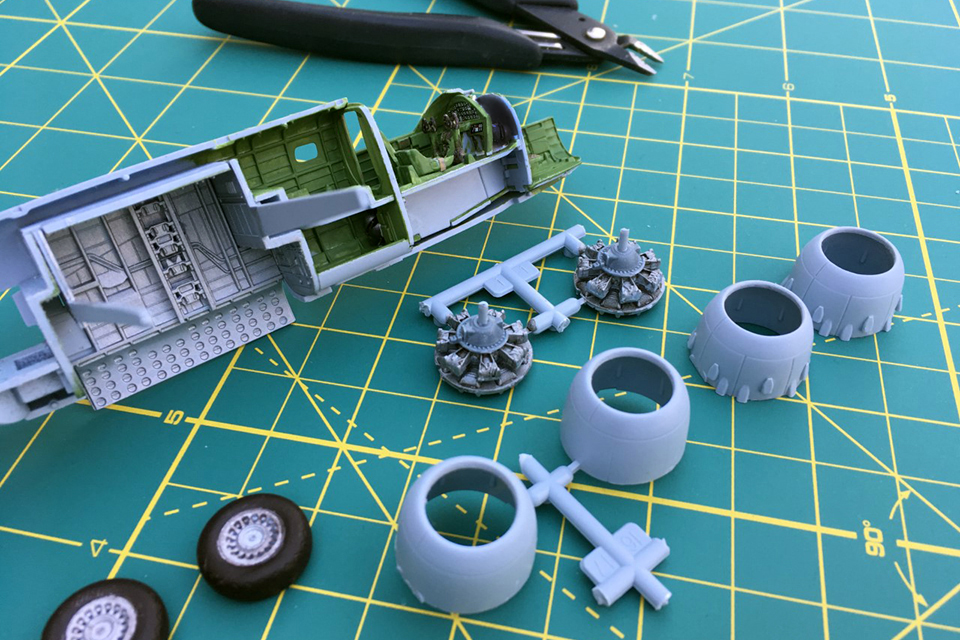
Begin with the cockpit. A decal is provided to represent the instrument panel, but metal-etched detail sets are available to give the cockpit that extra boost. The cockpit assembly includes the bombardier’s position. Once it’s complete, install the assembled flight deck to the left half of the fuselage. Following the instructions, add the bulkheads that also make up the bomb bay. The bomb bay section of early Mitchells was sometimes left natural metal rather than the standard interior green (FS34151) found in the rest of the airplane. A natural aluminum color will help set off the B-25’s ordnance. For the Doolittle Raid, most of the Mitchells carried three 500-pound bombs and one M7 incendiary. Paint the bombs a yellowish chromate green. Early in the war most of the available bombs were painted this color as opposed to the more familiar olive drab.
The B-25 wants to be a “tail sitter,” so added weight in the nose is a must. Small lead fishing sinkers work well tucked into the spaces around the cockpit, though the glass nose does limit the available space. If you find you can’t add enough weight to keep the bomber on its tricycle landing gear, there is a solution (see below) during the final stages of assembly. Now bring the fuselage halves together. Putty as necessary—the overall fit is very good—and set the assembly aside.
With the fuselage complete, it’s time to paint and assemble the two Wright R-2600 Double Cyclone radial engines. There are two sets of engine cowlings—choose the smooth version and check the instructions. The second set has a series of small cooling intakes around the back half of the cowling, a modification in later aircraft.
Doolittle Details
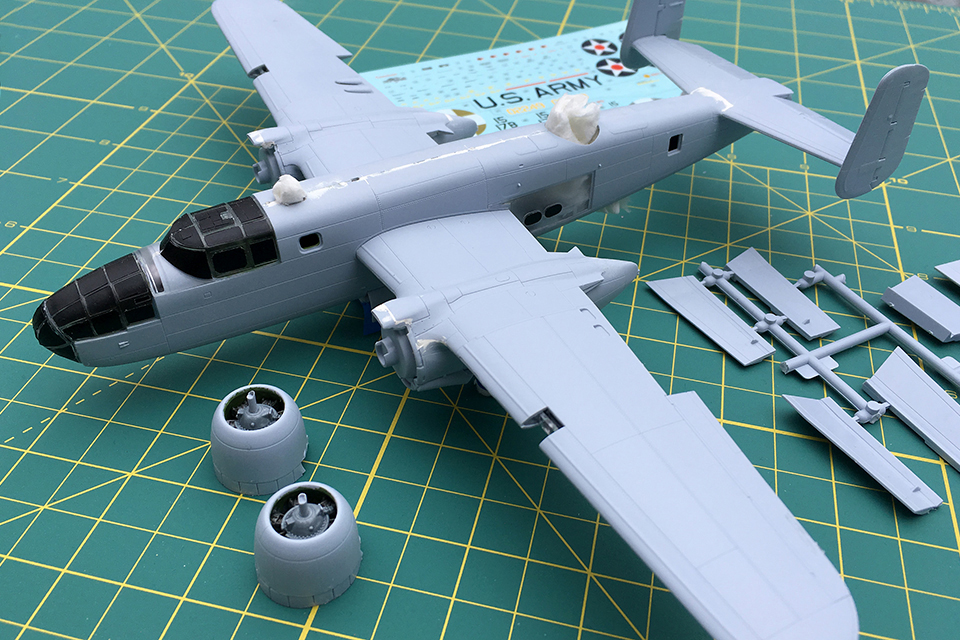
Put together the horizontal and vertical stabilizers and attach the assembly to the fuselage. Use the piece provided to cover the ventral machine gun turret position. The remotely powered machine gun turret was one of the first things removed as Lt. Col. Jimmy Doolittle looked to save weight and increase the bomber’s range. Attach the wings and the aircraft begins to take on its classic shape.
Invest in a set of precut adhesive masks. The “greenhouse” Plexiglas panes that make up the cockpit and nose section are difficult to cut by hand. Attach those sections to the fuselage, wrap the landing gear, fill the top turret position with tissue and the airplane is ready for a coat of paint.
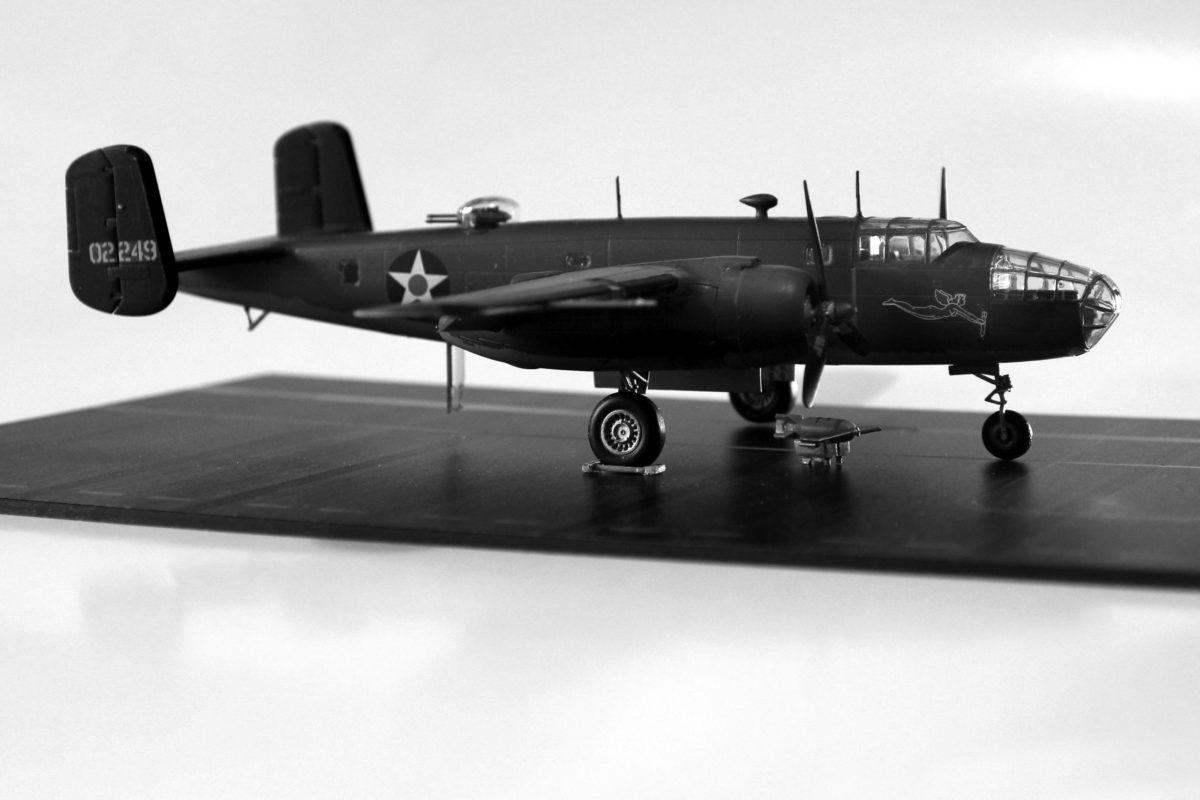
The bomber was painted olive drab (FS34087) over neutral gray (FS36270) undersurfaces. Don’t forget the black deicer boots along the leading edges of the wings and tail. Once the masking and painting is complete, a coat of clear gloss gets the model ready for a set of decals.
The kit comes with two choices of markings, but the obvious one for most modelers is sure to be Hari Kari-er, the 11th Doolittle Raider to launch. This bomber is one of the few for which photographic evidence exists of its nose art while on Hornet’s deck. The kit decals are very nice and settle comfortably into panel lines with the help of a setting solution.
Apply a flat clear coat and Hari Kari-er is almost complete. It’s time to attach the smaller detail parts, the tail skid, main gear tires and antennas. The model was designed so that a number of fuselage windows can be added from the outside, after painting. Most kits require these clear parts to be glued in place from the inside, requiring additional masking.
The crew hatches can be displayed opened or closed, but an open rear hatch will help the bomber sit correctly on its landing gear. If you attach a small piece of clear sheet plastic to that crew door it will aid in supporting the aft section of the airplane.
Ready for the carrier deck
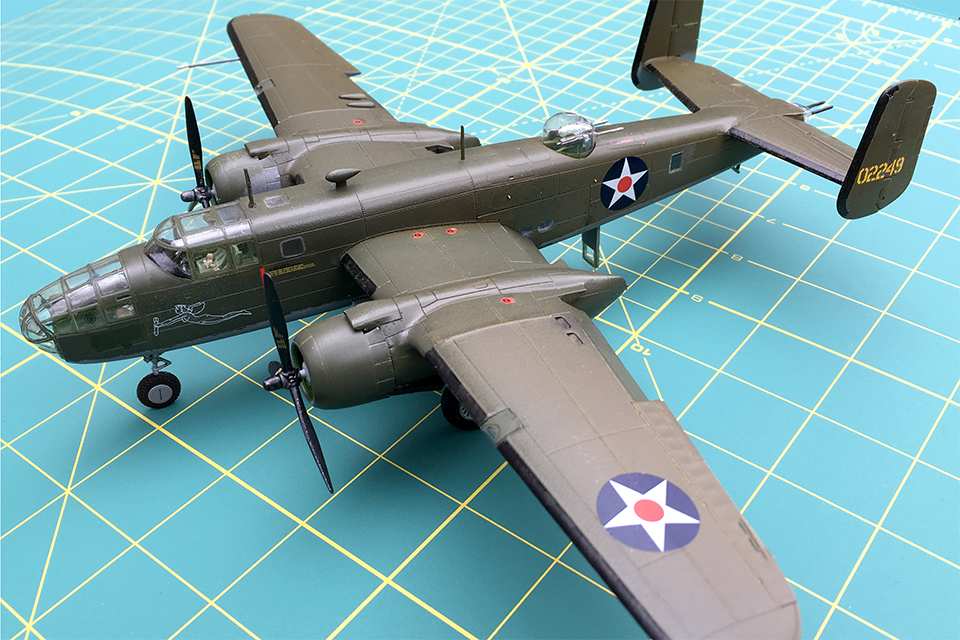
Attach the propellers and the clear tail cone, complete with two fake machine guns meant to deter enemy fighters. Finally, slide the completed dorsal machine gun turret into place and your Doolittle Raider is ready for its famous mission.
Read more about the development of the B-25 Mitchell bomber in the May 2020 issue of Aviation History.