The Tamiya Plastic Model Company of Japan produces two kits of the Aichi M6A1 Seiran, one in 1/48th scale and another in the smaller 1/72nd version. We’re using the smaller scale model for our project. Construction starts with the assembly and painting of the cockpit and navigator/gunner’s station. Paint the area a light gray-green, which is a very close match to a World War II German color, RLM-02 Grau (gray). The pilot’s instrument panel and the navigator’s radio set should be brushed with semi-gloss black. There are two decals for the face of the radio and the pilot’s gauges that can be applied once the paint is dry.
The crew’s seats have decals that replicate safety harnesses; these are quite effective and serve to add realism to the model’s interior. Cement the completed cockpit into one side of the fuselage, making sure the floor is level before setting the assembly aside to dry.
The Seiran was equipped with floats, so it needed beaching gear for servicing on land. While you’re waiting for the cockpit area to set up, jump ahead on the instruction sheet to step nine, and build and paint the dolly included in the kit. This detail will add interest when you display your completed model.
With the cockpit securely attached to one of the fuselage sides, spread a small pool of white glue in the engine area of each half. Drop a half dozen BBs into each of the puddles and, when it’s finished drying, close the fuselage sides. The BBs add necessary weight to the front of the aircraft, so the completed model will sit properly on the dolly.
Next glue the horizontal stabilizers and the cap on the vertical tail into position. One of the most difficult tasks in assembling any model aircraft is getting a satisfactory wing-to-fuselage joint without a lot of sanding and filling. It’s possible to eliminate this extra work and the resulting loss of detail if you carefully cement the top sections of the wings to the fuselage from the inside before adding the bottom portion of the wings.
Assemble the dual floats and fit them together; it should take only a few passes with sandpaper to get a near-perfect seam. Then cement together the 800-kilogram bomb. Next paint it dark gray and set it aside to dry.
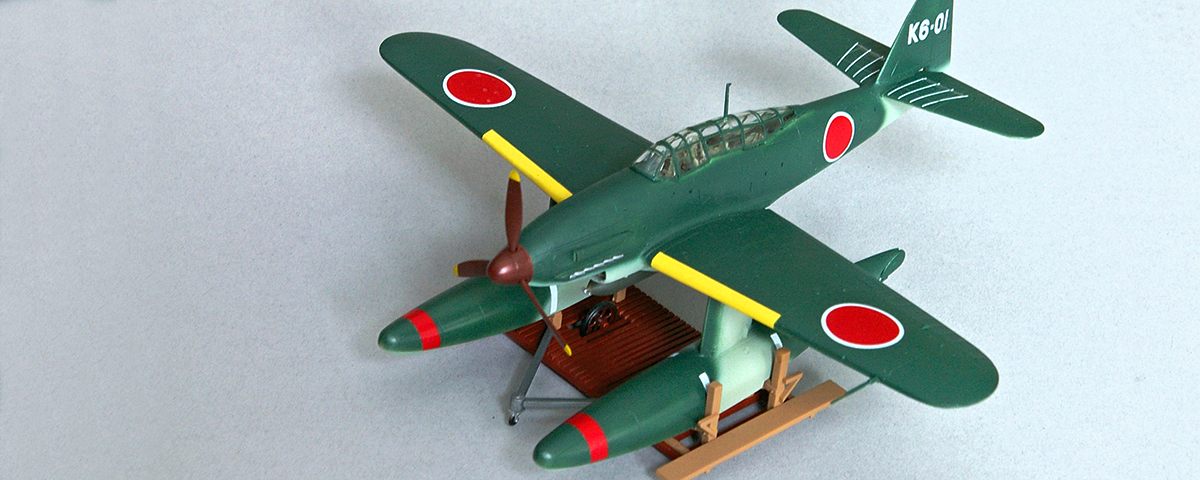
The propeller and spinner of the Smithsonian National Air and Space Museum’s M6A1 are painted a reddish brown, with yellow tips only on the front side of the blades (this is a close match to Gunze Sangyo’s “cocoa brown,” No. 17.) According to the museum’s research data, when the number of Seirans on the I-400 submarines was increased from two to three, space became critical, and a blunt spinner was devised to save room inside the hangar tubes. Two spinners are included in the kit; use the less pointed one for your model.
With the basic construction complete, stuff some wet tissue into the cockpit area and spray a light coat of primer over the model. This will reveal any areas that still need sanding and filling before you apply the color coats.
The underside of the Seirans followed Imperial Japanese Navy specifications and were painted IJN light gray with topsides in IJN dark green. The last step in construction is to mask and paint the framework of the “greenhouse” that covers the cockpit. This process can be simplified by cutting thin strips of tape and masking and painting all of the vertical frames first. When those are dry, mask and paint the remaining horizontal canopy braces. Once you apply the kit markings and place the model on its dolly, your Aichi M6A1 is ready for display.