
The 1/72nd-scale Fisher XP-75 Eagle model offered by the Czech company Valom is a short-run multimedia kit. In a way, it’s fitting, as the actual XP-75 was also a “short-run” fighter, with only a handful ever being built.
Valom has actually produced three kits of this unique aircraft: the XP-75 heavy fighter prototype, the prototype of the proposed production version and the production P-75A Eagle. The kit includes injection-molded parts, detailed resin pieces and an etched-brass detail fret. The model has nice surface detail and is a straightforward build. The instruction sheet is very basic and gives the modeler only a general idea of how the kit should be assembled. As a result, research is very important.
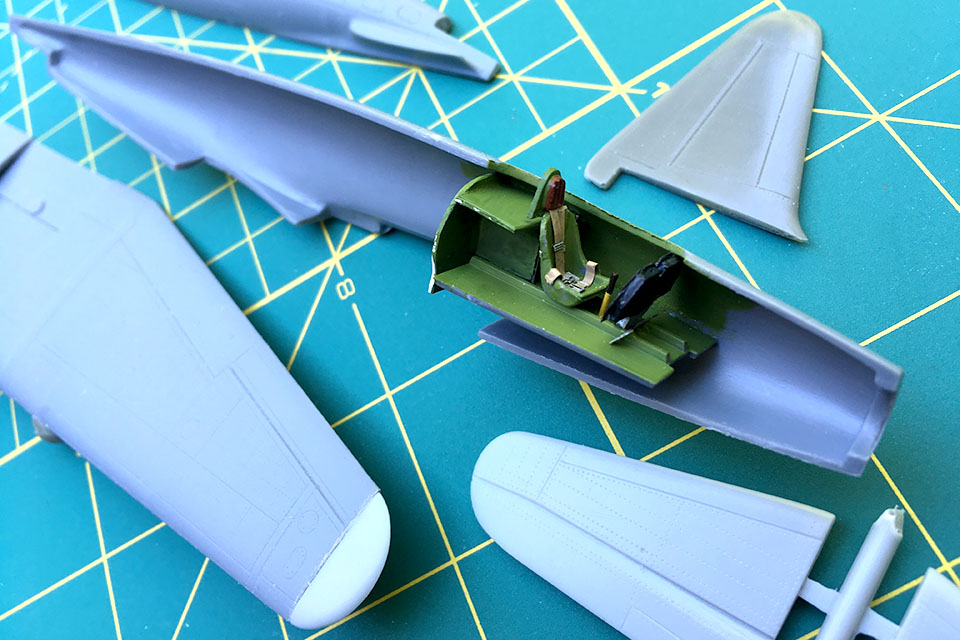
While the cockpit is a bit sparse on detail, the addition of seatbelts and an instrument panel from the etched-metal detail set helps. Conversely, replacing the very heavily molded control stick is a good idea. Be careful as you complete the cockpit. As simple as it looks, measuring and test-fitting is a must. For help in positioning the finished cockpit, there are only two simple ridges along the left side of the fuselage to show where the cockpit floor should align.
Assemble the wings. Carefully cement the top pieces to the bottom of the wing. There are no locating pins with this kit so be careful in aligning the parts. Two metal panels need to be glued in place under the wing. The parts have detail that would show off the ports where spent shells from the six machine guns were ejected. Since this build will be the prototype of the redesigned XP-75, use the pieces with the smooth side showing. There are two resin pieces that will make up part of the landing gear bay. Carefully glue them in place. Now the wing is nearly complete. For this version, use a razor saw to “clip” the square wing tips and attach the rounded ones supplied in the kit. Set the assembly aside.
The XP-75 has a rather large radiator under the fuselage, similar to a P-51 Mustang’s. Fit the two etched-metal mesh parts inside each intake. Put the two halves together, fill and sand, then set it aside.
Before putting together the two fuselage halves, do something about the empty space behind the seat. Cut down a piece of card stock—in this case an old plastic gift card does the trick. Now carefully cement the two halves together and fill and sand the seams. There are a number of small fairings that need to be attached. Four tiny parts just behind the propeller hub represent the four .50-caliber machine guns that would be mounted in the fuselage, firing through the two contrarotating props.
There are eight exhaust ports at the center of the fuselage. Four are part of the resin detail set. The instructions are unclear as to where exactly the pieces should be located. The National Museum of the U.S. Air Force has the only surviving example of the P-75. A late production airplane, it can still be used as a template to show just where these tiny pieces belong.

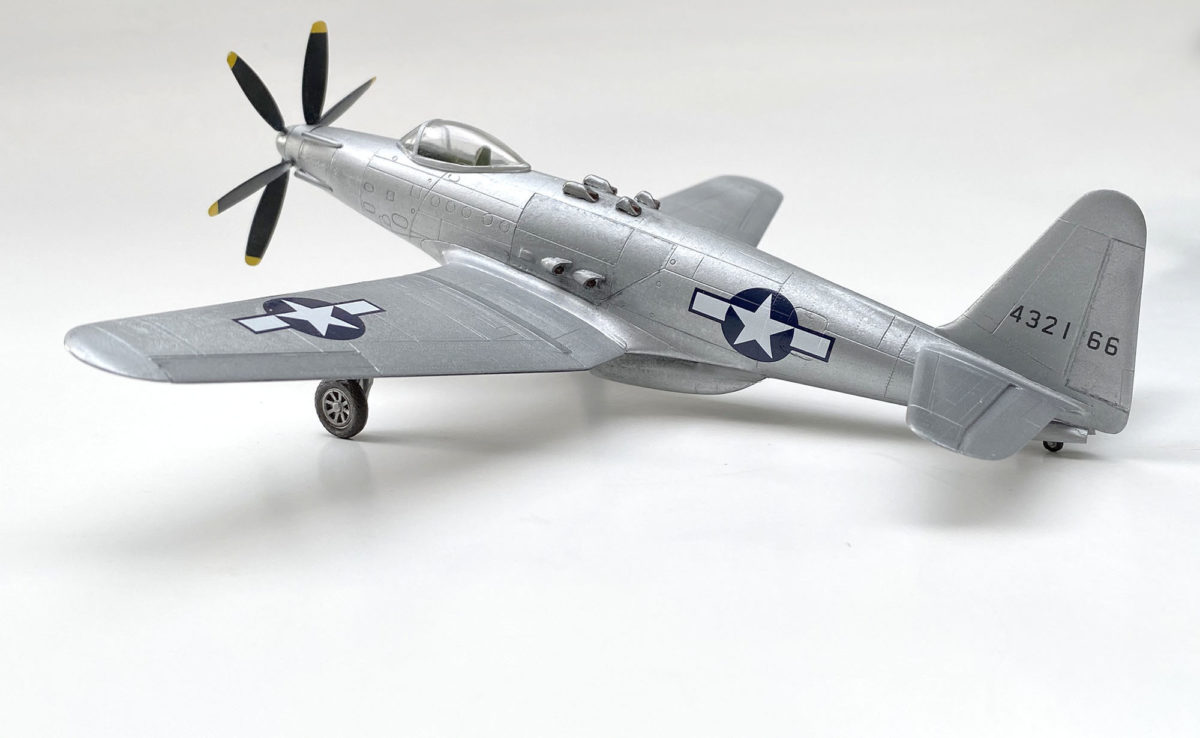
Attach the wing assembly, rudder and horizontal stabilizers to the fuselage. Fill and sand, making sure the surface seams are smooth. This XP-75 had a natural metal finish. Vary different tints of color by masking off areas along panel lines can create subtle differences in the overall metallic silver color. This can be accomplished by using gloss and flat varnishes along with the variety of metallic colors. This model was painted with a spray that can be buffed to a glossy sheen with a soft cloth. A pair of white cotton gloves work nicely. The color is polished and sealed with a coat of a clear gloss. Remove the masks and touch up the paint job as needed.
Painting complete, attach the landing gear and add the markings. As a test aircraft, the markings are pretty basic. National insignia and a tail number is all that’s needed. The kit-supplied decals are thin and work well with a decal setting solution.
The contrarotating propellers are composed of six individual blades and a two-part spinner. Be careful in positioning the props so arrangement of the three blades is correct. When the two sets of propellers are complete, add it to the nose of this unique-looking fighter. Glue the single-piece clear canopy in place with white glue or a cement specifically designed for clear parts. Your XP-75A is now ready for the Muroc dry lakebed at Edwards Air Force Base or your display shelf with the rest of those curious test aircraft.
Learn more about the history of this unique aircraft. Read Why America’s XP-75 Eagle Was a Turkey from the September 2020 issue of Aviation History. To subscribe, click here!