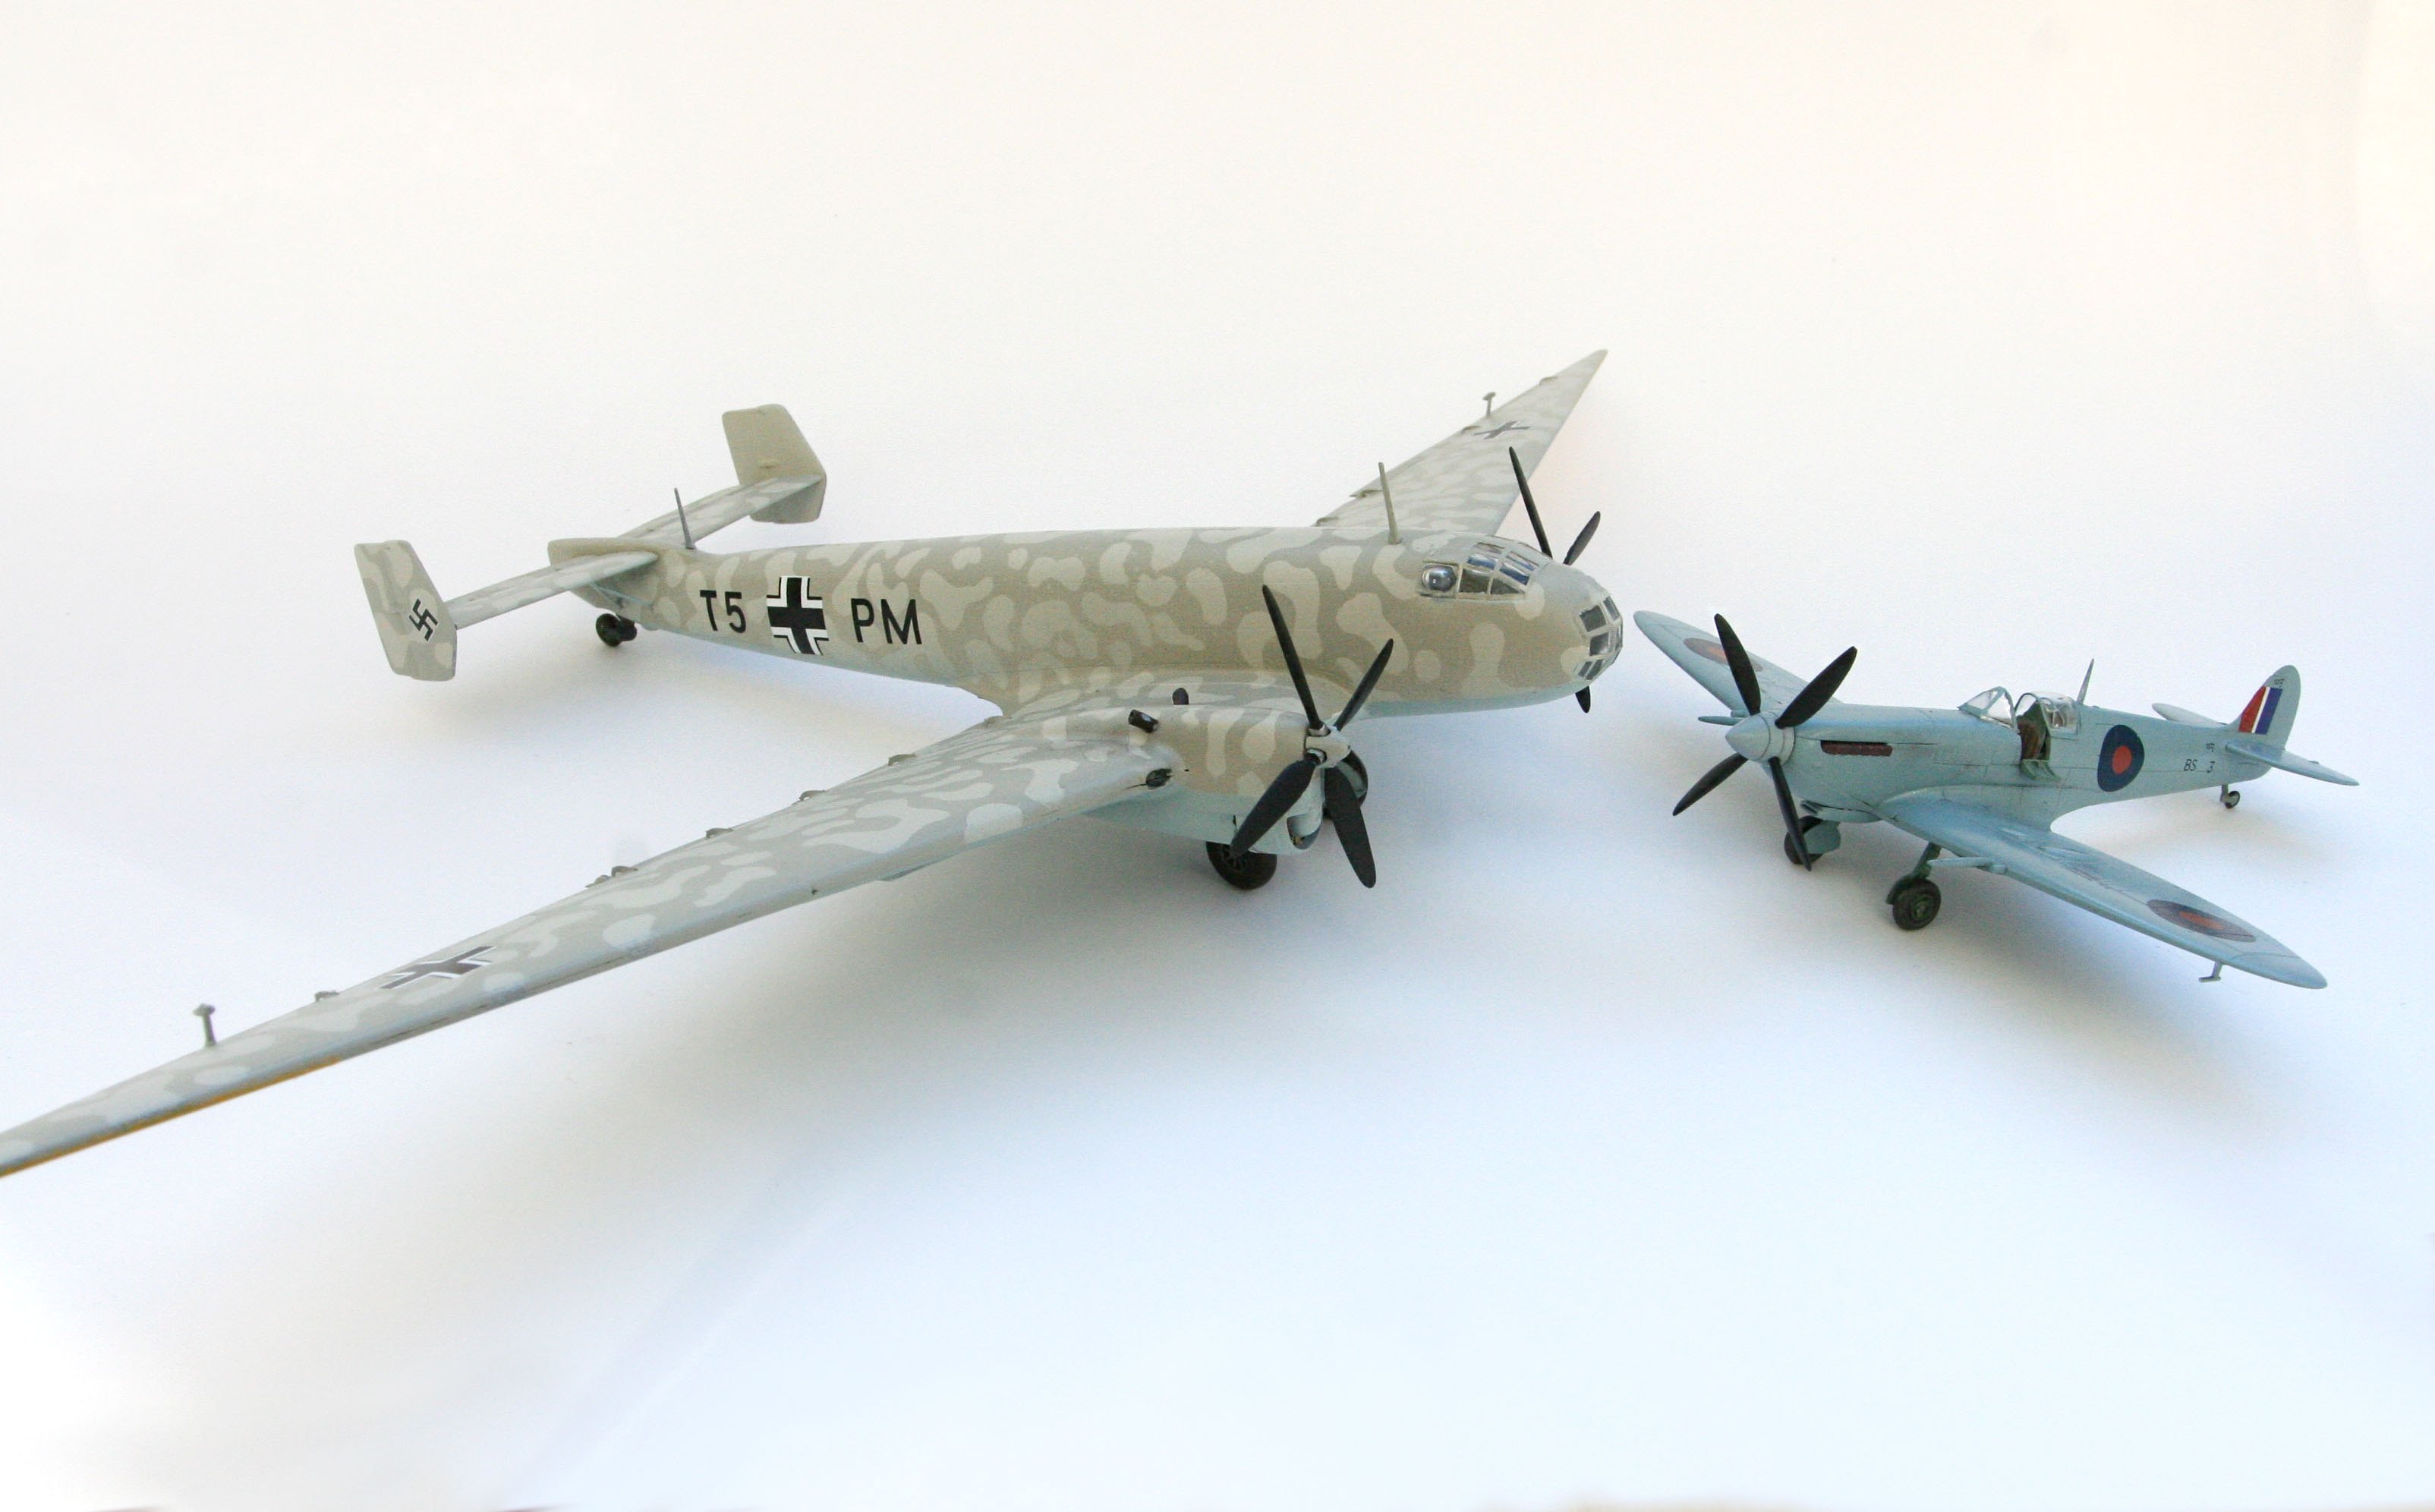
On September 12, 1942, two aircraft—a twin-engine Junkers Ju-86R and a Supermarine Spitfire IX, each specially modified for their missions—met in the rarefied air above southern England in the highest aerial combat of World War II (see “The Luftwaffe’s High-Flying Diesel”). The Junkers was designed to snoop on airfields and installations from altitudes that the Luftwaffe thought would make the specially modified former medium bomber untouchable. But the Royal Air Force had other ideas, modifying a pair of Spitfires to counter the new threat.
I was more than a bit surprised to find a Junkers Ju-86R kit on the market. RS Models, a small Czech company, has a number of different variations of the aircraft in 1/72nd scale. The kit is nicely detailed, and includes an etched metal detail set. Decals for three aircraft, including the one involved in the high-altitude combat, are included. I decided to pair it with an Airfix Spitfire Mk.IX (making a few minor adjustments) for a high-flying duo.
Airfix Spitfire Mk.IX
The fighter was an early Mk.IX, modified for this special mission. Ground crew removed more than 400 pounds of excess weight to enable the Spitfire to reach the altitudes at which the enemy operated. They also removed cockpit armor and the fighter’s four .303-caliber machine guns, leaving only the two 20mm Hispano cannons. A single solid light-blue color would hopefully make the fighter difficult to see. Unfortunately, there are no known photos of the two modified aircraft. What little information there is comes from the pilot’s description.
The Airfix Spitfire Mk.IX is a great little kit with crisp molding and good fit. Modifying the fighter isn’t too complicated. Pavla, a small company from the Czech Republic, produces a number of reasonably priced resin detail sets that add a little extra to the build. First you’ll want to fill the under-wing machine gun ejector ports, as those weapons were removed. This Spitfire was an early production version and would probably have had slightly larger bulges on the wings to accommodate the 20mm cannons. The detail set includes those bulges. Removing the panel on the wing and inserting the new piece is relatively minor surgery. Sanding down the armored headrest is next, and by following the detailed drawings, you’ll produce a nice cockpit.
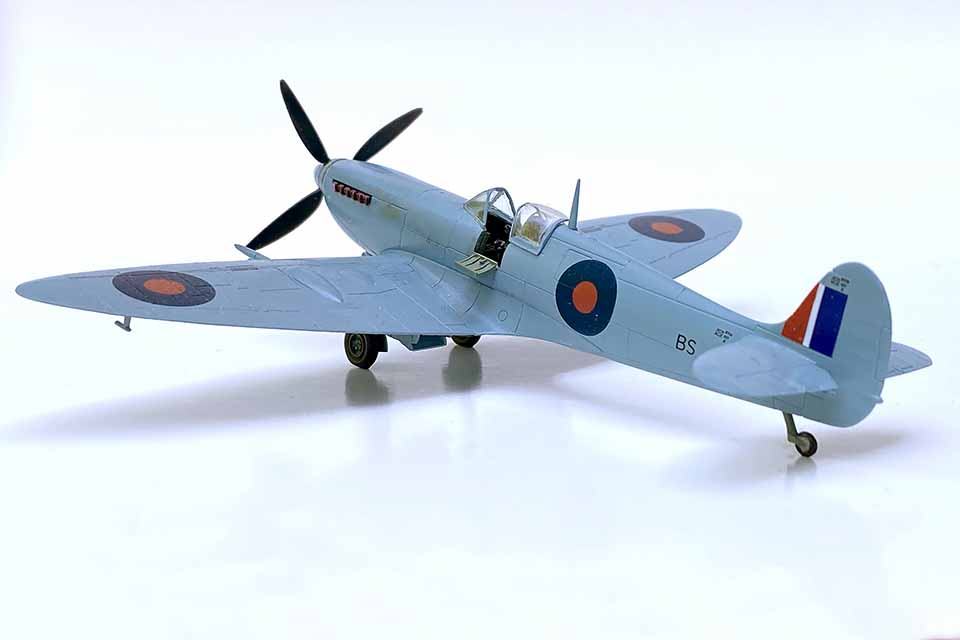
With the cockpit complete, the wings and fuselage come together quickly. Flying Officer Emanuel Galitzine (a Russian prince), who flew the September 12 mission, described the solid overall color of the airplane as a special lightweight finish that gave the aircraft a “Cambridge blue” appearance. The exact color is open to interpretation. Markings are simple, with roundels in six positions on the wings and fuselage. I had to cobble together the serial number (BS273) that appears on the rear of the fuselage. Even the actual serial number seems to be open to debate: Some research suggests that BF273 was the original and a painting error led to BS273—or was it the other way around? Galitzine’s Spitfire would probably have a slightly glossy finish. Add some mild weathering, the landing gear, propeller and canopy, and this uniquely modified fighter is ready to meet its enemy in the stratosphere.
RS Models Junkers Ju-86R
Fair warning: This kit is not for the novice. It does come with an etched brass detail set that will enhance the cockpit, but the molding is a bit heavy. Be ready to spend some time cleaning parts and dry fitting at least a couple of times before assembly. The instructions are a series of detailed drawings, but nearly half pertain only to the cockpit and the metal detail set. Your best tools are experience and the ability to think ahead. It’ll take patience to get through the complex assembly. After finishing the cockpit, turn your attention to the tapered outer wing. To help support that long tapered section, I inserted a piece of sprue that made the joint more stable. There are no alignment pins throughout. Dry fitting and plenty of time to make sure pieces are well aligned is a must. Fuselage halves, the inner wing section and engine nacelles—all need a little more prepping before assembly. Be ready to spend some time sanding the putty you’ll need at nearly every seam. Your patience will be rewarded.
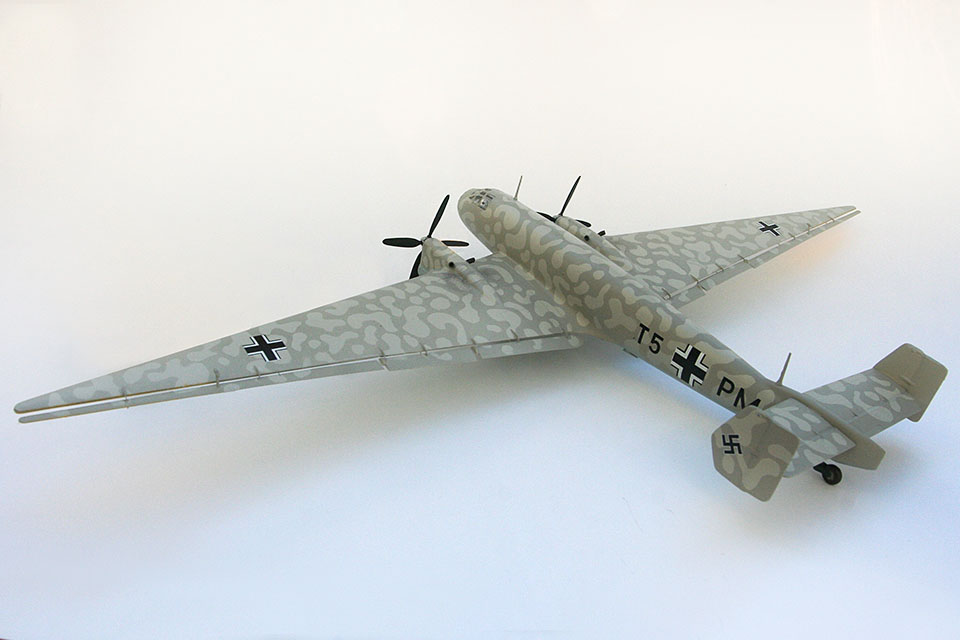
Add the pieces for the two diesel engines, and the completed fuselage and wing can come together. It’s nearly time to paint. Masking the greenhouse-like canopy takes care and a sharp blade. The airplane’s underside would have been a standard Hellblau, a light-blue color. Photos show upper surfaces of the airplane in a mottled two-tone gray camouflage scheme. The camouflage requires copious masking and plenty of patience. Cover the upper surfaces with carefully cut out shapes of Tamiya masking tape, using the box art and references as a guide. Designed for just this kind of thing, the tape conforms to corners and is easy to remove. Seal it all with a light gloss coat. It’s time to add details, landing gear, propellers and those classic Junkers flaps. Apply the markings for our protagonist from the decals that come with the kit. After the decals set, a semi-gloss coat seals the deal. Pick away the masking from the canopy and this unique aircraft is ready to go toe-to-toe with an equally unique Spitfire. Your high-flying duo is complete.