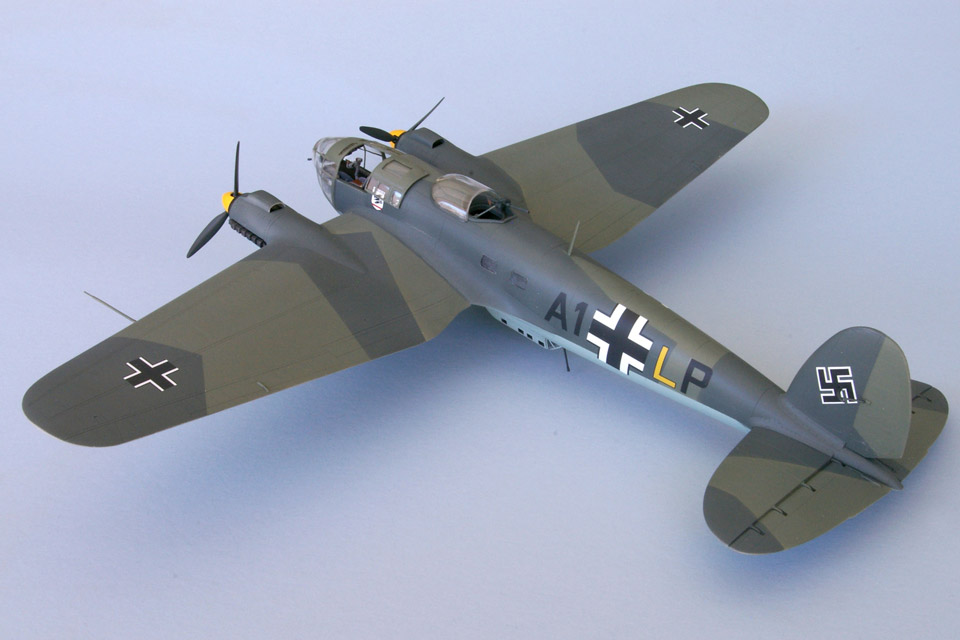
Revell and Monogram’s 1/48th-scale Heinkel He-111 kit builds into a very large model with a wingspan of more than 18 inches. Among the best German World War II bomber kits available, it has been on the market since 1994.
The cockpit is made up of 20 individual pieces. Paint the walls and floor overall RLM-66, dark gray. The instrument boxes should be flat black, FS-37038, picking out switches and dials with dots of red, yellow and silver. The pilot’s seat frame should be painted RLM-66 with “leather” cushions, as should the bombardier/navigator’s seat. Seat belts for both come from Eduard photo-etch set FE-245.
Before installing the cockpit assembly, paint the interior of the fuselage sides RLM-66. The cockpit and bomb bay bulkheads should also be dark gray, painting some of the instrument boxes on the cockpit walls flat black and RLM-02, gray green. Varying the colors in this area will add interest and detail once the cockpit is installed under the expansive “greenhouse.”
Paint the tail wheel gear RLM-02, then fit it into the aft section of a fuselage side. But don’t install the tire yet. The bulkheads double as wing spars; carefully fit them into the fuselage sides and glue them securely, since they will bear the weight of the large wings.
Assemble the horizontal stabilizer parts and glue them in place from the inside of the fuselage. If you’ve done this properly, there’ll be no glue marks on the fuselage. While the glue is drying, fit the interior and main landing gear door parts to the lower parts of the port and starboard wings. Follow the instructions carefully: These parts look alike, but they are not! A mistake here will result in your model sitting incorrectly.
Paint the gear bays and door interiors RLM-02. While those dry, remove the landing gear legs from the sprues and study the parts carefully. Take your time with this complicated assembly, since there are subtle differences between these parts as well. Once the legs are together, paint them RLM-02, with black shock absorber boots. Don’t install the landing gear yet.
Now assemble wing top and bottom, along with the engine nacelles. These parts are also “handed,” so pay attention to the part numbers listed in the instructions. Close the fuselage sides, making sure the bulkhead spars fit snugly into the slots on the wings. Be sure the wings are set solid, then glue the completed cockpit into the fuselage forward portion. Take extra care when sanding, filling and painting at this point, as the cockpit will stick out from the fuselage.
The Heinkel He-111H-2s that took part in the Adlertag (Eagle Day) raids on England in August 1940 were standard bombers, not configured to carry the very large blockbuster bombs or torpedoes included in the kit. Adlertag He-111s wore early-war German splinter camouflage: RLM-71, dark green, and RLM-70, black green, over light blue, RLM-65. If possible, use vinyl mask set no. 8, from EZ Masks in Ontario, Canada (ezmasks.com), to avoid getting mired in a nightmare of masking tape strips with the greenhouse cockpit. Attach the painted clear parts to the fuselage with white glue.
Once you’ve finished with camouflage, spray a coat of Future floor wax over your model to provide a smooth bed for the decals. The He-111 shown here is from Kampfgeschwader 53, “Legion Condor,” which was based in France on August 10, 1940. I used the A1+LP markings found on two SuperScale decal sheets, 49-838 and 48-839. Finish the model by painting the prop spinners RLM-03, yellow, and applying a dulling spray to the fuselage and wings. After you remove the paint masks from the clear parts, your model will be ready for display.